Dan's Long-Awaited Photo Tutorial-ish Thing
(page 3)
First published 5 December 2003.Last modified 03-Dec-2011.
Editing
OK, so you've got your picture.
Now what?
Well, the quick and dirty course of action is to just crop the thing nice and tightly (whitespace around the subject is bad, for low resolution Web images and many other utilitarian product shots).

If you're going to crop a picture of something, crop it, at least fairly close to whatever the final crop's going to be, before you start doing any other editing. That saves you from accidentally spending time masking and de-dusting and otherwise mucking about with parts of the image that you're going to throw away anyway.
If you're doing stuff for print publication, this can be where your editing ends. Heck, you don't even need to crop if you don't want to. If nobody's asked you to gussy up the pictures yourself, then just give 'em the originals, fresh out of the camera. Stuff that makes pictures pretty for the Web does not match stuff that makes pictures pretty for CMYK paper publication, and every tweak you apply destroys information.
Assuming you're working for yourself, though - once the picture's cropped, you can apply as much or as little prettification as you like.
The very fastest way to do this is by applying your image editing program's equivalent of the Photoshop Auto Levels command - or the superior Auto Color, for Photoshop 7 and later. Auto Levels/Color is a one-shot magic bullet for most images; it eliminates colour casts, improves contrast, and punches up brightness.
Do that, then scale the image to the size you need (or sizes, if you want to do what I do and give people a bigger image linked from a smaller one), sharpen it, and you're done.
Sharpening needs a bit more description just by itself. Digital and analogue photo professionals have a mild obsession with the subject. There are tons of sharpening techniques out there, from the subtle to the pre-rolled. It's surprisingly difficult to find a Photoshop filter that someone hasn't somehow pressed into service as a sharpening tool.
How much sharpening to use? Well, Photoshop's default Unsharp Mask setting (50% Amount, 1 pixel Radius, 0 Threshold) will generally do an OK job, though I now prefer to wind the Radius down to only 0.2 pixels and the Amount up to 500% or so. Fiddle around and see what you think, and remember that you can always (in Photoshop, at least) "Fade" the result of a sharpen operation (or any other filter), to mix it with the pre-filter image and thus reduce the filter's effect.
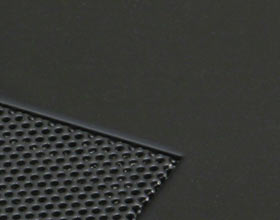
Some subjects benefit from gentle sharpening.
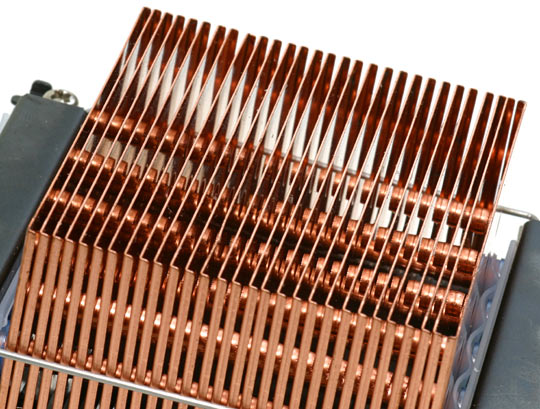
Heat sinks with lots of parallel fins, for instance...
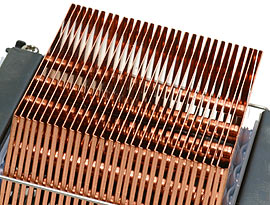
...can turn into eye-punishing picket fences if you sharpen them a "normal" amount.
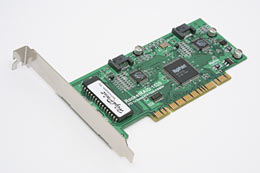
The same goes for shots of circuit boards, which tend to be very "busy", with tons of track detail.
You don't want heat-sink fins to turn into something resembling backlit Venetian blinds, and you don't want circuit tracks to turn into a neon-lit hedge maze to distract the viewer from the actual subject of the picture, which is usually a chip in the middle of the image, not the circuit tracks around it.
Over-sharpening guarantees a bigger file size, too. Generally, subjects with lots of detail that'll be over-emphasised by the usual amount of sharpening will make quite big files in the first place. Motherboard close-ups are always big files.
Here are some quick tips on using Unsharp Mask. Here's some info on what it actually does.
OK. Right. Where was I? Oh yeah, tweaking images, and what you can do if you choose to go beyond mere Auto Levels.

Tweaking levels by hand lets you get better results than Auto Whatever, and damage the image less; it's less intuitive than simple Contrast and Brightness sliders (which Photoshop also has), but more powerful.
Auto Whatever will throw away a set amount of the brightest and darkest portions of the image when it stretches the intensity range out to improve the contrast. Play with the highlight and shadow slidey-things (a technical term) in Levels manually and you can choose how much, or how little, of this effect to apply.
You can also change image gamma - relative mid-tone brightness - in the levels settings. Drag the middle slider to the left for brighter midtones (this is usually what you want; about a 1.1 midtone slider setting is commonly desirable), or to the right for darker.
You can also get rid of colour casts manually, by either adjusting the levels for the red, green and blue channels separately (slow), or by just telling Photoshop (or various other with-it image editors) what you want to be grey. In Photoshop, click the middle eyedropper button, then click on something that's meant to be some shade of grey, but isn't. Near-black portions of the image often work well. Photoshop will then automatically tweak the curves, without changing contrast levels, with your new "white balance" setting. This is explained in more detail here.
And then, there's colour saturation. Consumer digital cameras often produce images with artificially high colour saturation, because that looks great for happy snaps. The more professional a camera is, the more neutral its colour response will be. Many pro-cam images benefit from a slight colour punch-up.

I usually apply only a 10% boost. Much more than that and you're on the way to a Jimi Hendrix poster.
If you want a general purpose contrast enhancement that looks good with practically everything, try Unsharp Mask set to an Amount of only about 20%, and a very large radius - 75 pixels, say. It's a neat trick.
As with various other often-used tweaks, it's easy to make a Photoshop Action to do this. If you don't, you'll be spending your life changing Unsharp Mask settings from the contrast-boost setting to the normal-sharpen one.
The result you end up with from all this depends on your taste in contrast and saturation.

Here's a relatively mildly tweaked version.

Here's one with boosted contrast.
So - what size should your final image be?
Well, if you're working somewhere that's got a style guide that decrees that all images must be X by Y pixels, and must not exceed Z kilobytes in size, then do that. Quality JPEG savers like Photoshop's "Save For Web" all let you specify a file size for them to try to hit, rather than making you fish by hand through different quality levels and see what file size you get.
You should also squeeze your images hard if you've got serious bandwidth or storage space limits, of course.
Otherwise, go large. There's no point taking a nice picture in the first place if you're going to squish it into a 320 by 240, crunchalicious low quality JPEG.
Long-term readers can chart the widening of my server's pipe by the size of the images I post with my reviews.
The fiddly stuff
If you don't like the background all around the thing you're photographing, you can use simple erasing tools, masking off the top edge of the object to erase right up to it and carefully feathering the erasure into the trickier shadowed areas under the object. Photoshop's Dodge tool is good for lightening shadow edges for this purpose.

This is a pretty rough example of this technique.


These are nicer.
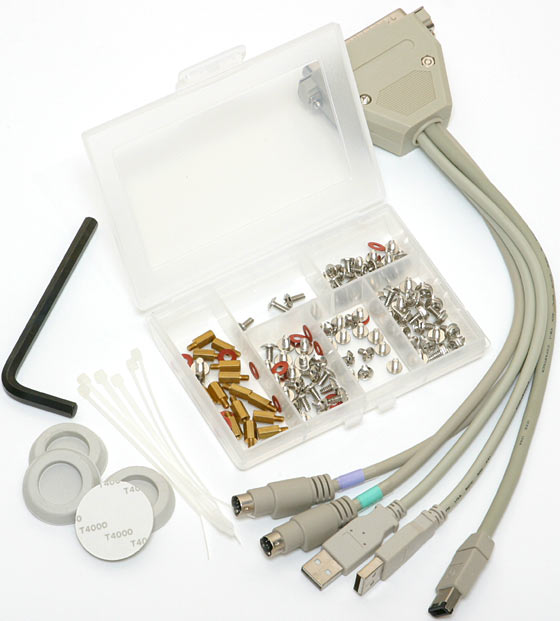
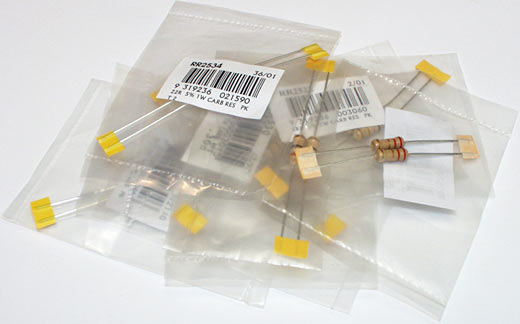
To make this technique work, it helps if the background is very clean to start with...

...as it is in this picture.
You can go further again, and I often do, by completely chopping your subject out of its background, then pasting the result onto a plain white background - or any other background you like, for that matter.
That's how you turn this:

...into this:

A lot of people like to put a fuzzy black drop-shadow under things when they do this. I just leave the background white.
There are many techniques for removing backgrounds from different kinds of pictures, but product shots are a special case.
The way pro photographers create pictures of things that have snowy-white backgrounds and little to no shadows is with carefully controlled lighting. The background is some unremarkable white material, far enough away from the camera to be out of focus (which hides any texture or dirt on it), and lit brightly enough (by hot lights or strobes) that it's overexposed. Massive overexposure of the background will cause unsightly "bleeding" onto the subject, but if the background's only mildly overexposed, it'll look great.
Shadows can be eliminated entirely by putting the subject on a thin clean sheet of horizontal glass or acrylic, suspended over the backdrop. You can also sit your subjects on a piece of translucent white plastic, lit from below - a film-viewing "light box" works well, as long as it's bright enough.
Now, you can do all that stuff if you want. It's probably too much hassle, though. You don't just need lots of space to set it all up, but you also need lights that're aimed and controlled (with "barn door" blinkers or more gimcrack light-blockers) so that they don't light the subject as well as the background.
The simpler solution is to just shoot your subject on a plain white background, which is lit by the same things that're lighting the subject, then edit out the shadows.
For all of my pictures of small objects, I use plain white paper as a background. You can buy wide rolls of "seamless paper" from photo supply houses to use as a background; use some contraption to hold the roll up off the ground, and you can just pull the paper out like a giant toilet roll to give you a fresh clean photo area every time.
The stuff I photograph is small enough that I can use A3 and even A4 printer paper as a background, though. You can't beat that price.
The more 3D your subject is, the more shadow problems you're going to have. Expansion cards are easy subjects, because they're pretty much flat and thus don't cast much of a shadow on whatever they're sitting on. Many other things aren't that cooperative.
If you've decided to chop something out of the background, then you're going to have to make very good friends with...

...this.
Click, click, click, click, around the edge of the object.
The regular Lasso tool is good if you've got a drawing tablet; the Polygonal Lasso is better if you're using the mouse.
There are plenty of other selection tools in the average image manipulation package, of course. Photoshop's edge-detecting Magnetic Lasso can rip around easily distinguished object edges faster than you can click-click-click them by hand, and the Magic Wand tool can select big chunks of background in the same way. And there's the Background Eraser tool in older Photoshops and the more advanced Extract function in newer versions, too.
Unless you're some kind of Photoshop virtuoso, though, you're likely to find that these tools often don't save nearly as much time as you'd think.
Check this out. It looks as if the Magic Wand's doing a dandy job of selecting the background, all ready for you to Select Inverse, Expand the selection a pixel, Feather the selection a pixel (to make nice soft edges), then Copy, make a new file with a white background, and Paste.
And the Wand genuinely is doing an excellent job on the top edges of the card, where there's no shadow.
If you try to Wandify too much of the background, though, getting too far into the (literally) grey area around the edges of the shadow, you're likely to end up with something more like this.

The Wand hasn't managed to select right in next to the edge of the card in some places, and it's invaded past the edge of the card in other places. The Magnetic Lasso has the same problem. Tidying up this sort of mess takes longer than manually lassoing the whole thing would.
(One feature I'd rather like to see in Photoshop, by the way, is a "what I just did, only the other way around" button, for those times when I've forgotten whether I'm selecting the product or the whitespace, and done a long and involved add-to-selection or subtract-from-selection operation, when I should be subtracting instead of adding or adding instead of subtracting.)
If you've decided to create a huge and complicated selection path, it's a good idea to create it a chunk at a time, just in case you accidentally double-click somewhere and complete it too early, probably creating a bow-tie-shaped selection half of which is worse than nothing.
Or also, for that matter, in case some background program helpfully pops to the front while you're working, steals the focus and ends the selection for you.
While laboriously creating a selection chunk by chunk, you may find it helps to pretend you're playing Qix.
What with all this fiddling, you've sometimes got to ask yourself whether it's worth the effort.

Something with lots of complex edges, translucent parts, plenty of places where the off-white of the background meets the slightly darker off-white of a complicated curved object...
Just photograph the thing on a good white background with no harsh shadows. Crop, tweak, scale, sharpen, save. Done. Time for a lolly.
Pitfalls
What can go wrong? Well, not that many things. Just the same darn things over and over again. Here are the greatest hits.
@^#&ing dust

At a glance, this looks like an OK pre-processing picture. Click it, though, and you'll see... dust. Cursed, horrible, implacable dust. I could have sworn it was clean, but I was wrong.
Dust is stupendously annoying. More annoying than bandits killing everyone in your village. Not necessarily quite as annoying as having the foil on the top of the yoghurt tub rip into little bits, of course, but still very annoying indeed.
Dust is also very difficult to avoid, unless you're shooting in a chip-fab clean room.
Dust leaps onto many plastic surfaces; it doesn't take much of a static charge to attract it.
Things with rubber parts are dust-grabbing maniacs, too. It settles, and it sticks.
And then, there's hairs. The cure for baldness is to point a camera at your head. Inside ten seconds, it'll be covered with hair.
Photoshop (and every other half-decent image editing package) has the Clone Stamp tool, which copies what's in one place to another place. You can get rid of dust and scratches quite easily with Clone Stamp - by which I mean, getting rid of each individual mote of dust and small section of scratch is, usually, easy.
Photoshop 7 and higher have the Healing Brush tool, which is even better for removing dust. It maintains the texture and lightness of the portion of the image you're healing, so you can take pixels from more places on the picture and slap 'em down without caring much whether they're brighter or darker than the ones you're covering.
With a little Healing Brush and a lot of Clone Stamp, it took me well under a minute to turn...

...this small excerpt of the above image...
...into this. There's little detail in the dusty portion of the image, so this one's very easy to fix.
Fixing a whole image worth of dust and hairs, though, can take a lot longer. If you're giving thought to cleaning up a photo of a product over which, apparently, someone about to die of chronic dandruff shook their head for five minutes, try to restrain yourself. Blow the gunk off the darn thing and photograph it again. Yes, we know you have mad Photoshop skillz. You need not prove it.
Just blowing on things with your Mark 1A Mouth is often an adequate anti-dust measure, provided you can avoid getting spit on them. For delicate work, get yourself a rubber-bulb puffer and a fine brush. For serious de-dusting, get a can of compressed-gas "air duster". Really tenacious gunk, up to and including ferrous fragments stuck to magnets, can be lifted off with sticky tape.
(You can also now get big "rocket" puffer bulbs, which get pretty close to the power of canned air duster.)
And try to remember to use these things. If your photo-taking area is particularly dusty, an air purifier will help (plain electrostatic will be fine - you don't need a HEPA-quality filter).
While you're digitally removing dust, you can also digitally remove scratches and other blemishes, to make the thing you photographed look more like a 3D render of itself. Why present a picture of a product, when you can present a picture of a Platonic ideal?
Well, because de-blemishing makes things look nicer than they actually are, which is not a product reviewer's job.
Still, when some piece of review gear's had a harder-than-usual life on its way to me, I've been known to delete cosmetic gouges, dents and marks that I have good reason to believe are not representative of the normal quality of the product.
Your ethics may vary.
The curse of the shiny things

Shooting reflective objects in an amateur studio is fine, as long as you don't care what's reflected in them.


If you do care, then you'll be irked by the fact that when you get just the composition you want, reflective things will always be reflecting the thing you'd least like them to.

They'll reflect you. They'll reflect the things around your little photo area. They'll reflect the pink felt parrot hanging from the ceiling.

Careful placement of baffles can help a lot with this problem; walling off a small subject with pieces of paper can work well, too.

There are also purpose-made micro-studio gadgets for "tenting" small objects, including shiny ones. They act as a light diffuser and all-around background, and they may also have camera holders and external light stands and so on. Some are quite large; some aren't; all are pretty expensive for what they are. You can hack up a similar gadget by buying a cheap white plastic bowl big enough to cover a small subject, and cutting a hole in it for your camera lens.
When shooting reflective things that have no colour of their own, by the way, you can't make reflections less noticeable and deal with colour casts by just using a greyscale-ify command like Photoshop's "Desaturate" to turn the image into black and white.
Well, you can, but it'll look weird.

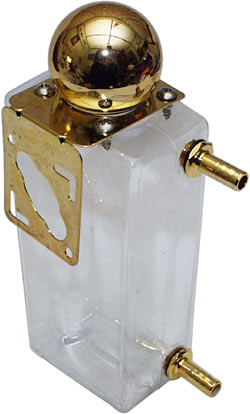
These fasteners are black and silver; no colour data there. But people expect things reflected in shiny things to have colour...

...so they look odd without it.
If there aren't any shiny surfaces, black, grey and silver computer peripherals are the testy photographer's friend. You can use whatever mix of lights you like, and whatever white balance settings you like, create a disco-lit colour original, then just drop it to greyscale to remove the weirdness.
Desaturate and similar commands, incidentally, create the greyscale version with an equal contribution from each of the three colour channels (red, green and blue). 100% red, green and blue will all turn into 50% grey.
Photoshop's Channel Mixer, in contrast, lets you pick the contribution each channel makes to the final greyscale version. By using Channel Mixer you can get an greyscale image with lower noise. Most of your image noise is likely to be in the blue channel, because digital camera sensors aren't very sensitive to the blue end of the spectrum, so that channel is amplified more, and noise in that channel is amplified along with it. You can thus make a greyscale version that's composed of 50% red and 50% green, or 40% red, 40% green and 20% blue, or whatever looks best to you, to reduce the contribution of the blue channel.
If you want to be really tricky, you can even do this with subjects that have coloured features. You just have to mask off the coloured parts before you desaturate the rest.
Going to these lengths for anything that's more complex than a grey object with one yellow warning label or red power light somewhere is a bit nuts, in case you were wondering.
Overexposure
Product pics generally look best when they're riding the ragged edge of overexposure - where their palest parts become solid white. "Blowing out" the highlights to white is undesirable, but a lot of photographers do it - by accident, or because they're having a hard time photographing something that's got dark parts and light parts. Dealing with this sort of dynamic range problem can be challenging.

Speakers are often tricky...

...but other things can be too.

Anything with a curvy, somewhat reflective part will tend to have a highlight on that part which you won't necessarily pay enough attention to when you're setting exposure. Some classier digicams can indicate blown out highlights by flashing them when you review the image.
Sometimes you can't avoid blowing out highlights - you're peering down the barrel of some gadget at an internal mechanism that you can't dig out of it, and you don't have some hoity-toity macro flash, so you're just going to wind up the exposure until the dimly lit inside of the barrel is nice and bright, which means everything around it will be solid white.
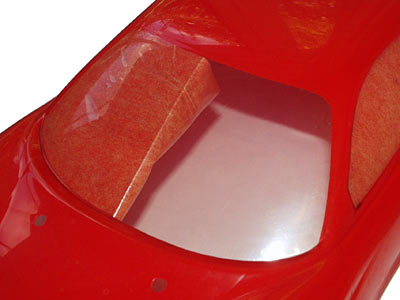
Clear things

It's difficult to create backgroundless pictures of things that have see-through components. If you use the pro-photographer overexposed-background technique, the overexposed background will show through the clear parts and overexpose them too. If you don't overexpose the background, and just chop out the background by hand and replace it with pure white, the clear parts will still show the colour of the old background, and will look strangely dark.
Quick solution: Leave the original background there, and just make the shot as nice as you can.

Also, if you can expect the clear parts to have shadows underneath them, then white all around the object is OK.
Otherwise, you're on your own.
Scanners
Flatbed scanners are cheap, and very useful for some kinds of gadget imaging.
If you don't own a half-decent digital camera, you can use a scanner as a stopgap, particularly if you're after an artistic effect. But flatbeds are meant to scan flat things, and the less flat your subject is, the worse a scan of it will look. Flatbeds have lousy depth of field, and expect to be looking at something that's pressed onto the glass - the further away from the glass something is, the less well focussed it'll be. You'll also get distortion effects on 3D objects.

This is about as good as gadget-scans get. The horizontal shadow lines are unavoidable, but at least the thing looks about the right shape.

This old hard drive motor is shaped like a top hat. The "brim" around the central spindle looks oval in this scan, but it's not; it's just as round as the spindle, but it's distorted because it's a couple of inches up off the scanner glass. Correcting this wouldn't be easy.
But hey, if you've got a scanner already, the thing probably will scan 3D objects well enough. It's better than photographing them with a cruddy little webcam.
You can even use non-flatbed scanners for some jobs!
Photographing computers
Photographing a computer that's turned off is easy. One that's on, with a glowing screen, is more difficult; you'll never get the exposure right for both the screen and the rest of the computer.
If all you want to photograph is a screen, it's easy. LCD screens you can just shoot like any other object, because LCDs don't have a refresh rate - there's no flicker to deal with.
The flickery top-to-bottom refresh of a CRT screen, though (wave your hand around in front of a CRT, observe the strobe-light effect, and you'll see what I mean), makes things trickier. You need a long enough exposure that the screen will have been completely repainted, preferably enough times that it looks evenly lit all over. This means a small aperture, to let you use a long-ish exposure on this brightly lit subject, and it also means you're probably going to need to use your tripod.
And no, flash won't help. At all.
To photograph a whole computer, put your camera on a tripod, and take a picture of the PC when it's turned off. Now turn on the computer, don't move the camera, and take another picture, with the monitor screen correctly exposed; never mind the rest of it. Now copy the correctly exposed monitor screen from the second picture onto the first picture, in the image editing package of your choice.
Finished, at last
The mark of the amateur is the doing of more work than is necessary.
Writing more than 10,000 words about how to take pictures of freakin' video cards, for instance.
Or creating an exquisitely detailed mask around a complex object in a product shot of a motherboard, so every protruding header pin and tiny mounting screw hole is distinct against the background. And then scaling the image down until it's 250 pixels across, leaving all of that detail well below the pixel level and looking exactly the same as it would have if all of the tiny zig-zags had been reduced to far fewer simple straight lines.
Now, if you want the high resolution original for future use in print, or something, then the extra work is justified. That's what I keep telling myself when I do it.
If you're shooting dozens - or hundreds - of products a day, then it's obviously going to be a good idea to set up a studio that'll give you close to perfect results right out of the camera. Even five minutes of retouching per image will add up really fast.
If that means turning a room into a semi-permanent shooting area, setting up a proper backdrop with proper lighting, and investing in a pretty expensive camera, then so be it. You've just got to do that, if you want to get the job done.
People who only have to do a bit of product photography in the course of their job or hobby, though, can get away with much less commitment. If you've already got a plain point-and-shoot integrated-lens digital camera, you're (financially) at least half way there already. Just add a cheap tripod, a couple of hardware-store floodlights and some paper and cardboard, and you're all set to take pro-grade product pics.
<< Back to page 1 |
<< Back to page 2 |

