Dan's Long-Awaited Photo Tutorial-ish Thing
(page 2)
First published 5 December 2003.Last modified 03-Dec-2011.
At last, something practical
OK, so you have to use small apertures, no matter what F-number your camera uses to describe them.
What's the problem with small apertures?
It's that inversely-proportional-to-the-F-stop-squared thing. A lot less light gets into a camera at F32 than at F4.5; 4.5 squared is 20.25, 32 squared is 1024, and the ratio between the two is about 50.6. Exposures for f32, all other things being equal, have to be more than 50 times as long as exposures for f4.5.
(This explains, by the way, why 35mm camera lenses that can go all the way down to f1.0 are rare, large and expensive. F1.0 doesn't let in 4.5 times as much light as f4.5; it lets in 20.25 times as much. And 1024 times as much light as f32.)
In my f4.5/f32 example, the f4.5 shot is a bit brighter than the f32 one, and I was blocking a bit more light with my body when I took it, so the exposure difference is only a factor of 30 - one-twentieth of a second versus 1.5 seconds.
Cameras that have smaller sensors and smaller F-numbers as a result don't have as much of a problem with this. A digicam with an f2.8 to f8 aperture range only needs exposures about eight times longer at its smallest aperture than at its widest one.
Even 1/20th of a second is far too long to hand-hold at the 136mm effective focal length I was using for the above shot, though; you'd be lucky to get a sharp picture even at 1/100th. Smaller digicams aren't rescued form this; there's no way you'll be able to hand-hold the camera and photograph things at minimum aperture by normal night-time indoor light.
That's why you need the tripod.
It's also why you need a lot of...
Light
Photographic exposure depends on four things - shutter speed, aperture, sensitivity and light.
If you're taking pictures with small aperture settings for the reasons mentioned above, this means you need to make up the difference in one or more of the other variables.
You can't do much on the sensitivity front. Digital cameras almost all have adjustable sensitivity, but when you adjust it all you're doing is multiplying the numbers that come out of the sensor, and that winds up the gain on noise as well as on real image detail.
Film and digital sensor sensitivity is described with an "ISO number", and the native, natural sensitivity of most digital sensors is about ISO 100. Many modern digital cameras manage to stay relatively noise-free at as much as ISO 400 or 800, which helps considerably; ISO 800 needs one-eighth the exposure time of ISO 100. But it still won't save you from long exposures, when you're using a small aperture.
In the olden days of digital photography, long exposure times were also out, because older sensors were very noisy and rapidly degenerated into a complete noise-storm if you left the shutter open for long.
This picture of a pretty dark back yard with my old Kodak DC120 was only a 16 second exposure, but if you click the thumbnail you'll see that there's still a lot of noise.
For comparison, this EOS-D60 picture of a rather darker object is a five minute exposure, as the star trails reveal.
Canon's DSLRs have held the crown for sensor noise reduction for some time now, but there are lots of consumer digitals that can now manage an exposure of 30 seconds or so, at ISO 100, without creating too much grunge. Some of them have a dedicated noise reduction mode that takes a second shot of the same length with the shutter closed, then automatically subtracts that image from the shutter-open picture, to compensate for "hot pixels" on the sensor. This doubles your shooting time, of course.
If you haven't the patience for lengthy exposures, you can use flash - or flashes. But to take good pictures with flashes you need something more than just the standard consumer-digicam forward-facing built-in strobe.
A forward-facing strobe shoots photons at the target as efficiently as anything's going to, but it makes it hard to see the shape of things (people's faces in flash-lit happy snaps tend to look as flat as a frying pan) and creates harsh ugly shadows. Nothing looks natural when it's lit by a forward-facing on-camera flash; light normally comes from above.
There's little you can do with a normal built-in flash to make it work better. You can diffuse it a bit by holding something in front of it (a piece of paper, for instance), but that eats a lot of the flash power and still doesn't help a great deal.
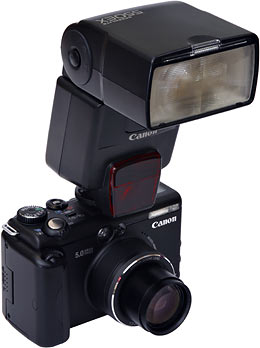
To get good looking flash pictures, you need relatively large diffusers or reflectors, and preferably more than one flash; if you've got one add-on on-camera flash...
...you shouldn't aim it forward, like this, unless you're trying to photograph someone on the other side of a football field. Aim the flash up and back, at a reflector (a piece of white cardboard held in your hand will do), to get a nice diffuse light.
There are various entertainingly expensive push-on pieces of plastic (OK, some of them are more impressive) that you can attach to add-on flashes to do this sort of thing, and they can be invaluable if you're hand-holding the camera (hands up, wedding photographers). But reverse aim and some cardboard gives better diffusion, costs nothing and is fine for tripod shots.
You can get a flash rig without spending a million dollars. There are various fairly cheap slave flashes made for digital cameras, that trigger when they see the camera's own flash fire (the cheapest slave flashes fire when they see one flash, which means they don't work with digital cameras that pre-flash to set exposure). But setting the flashes up can be a pain.
I've got a 550EX master flash and a 420EX slave for my D60, and I've taken a lot of great pictures with them, but I've been using other options more often lately.
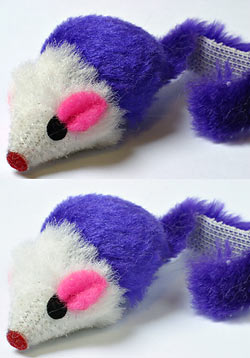
Fortunately, there's an enormous fusion reactor up in the sky for roughly half of most days, and it can be an excellent photo light. Direct sunlight is no good (harsh shadows, again), but overcast sunlight, sunlight bounced off a white surface, or sunlight diffused through cloth is great for photos. You can fill the shadows a bit more by using a reflector on the dimmer side of your subject:
No reflector in the top shot; a metal mouse mat to the right of the subject for the bottom one.
If you want more control over the light, or if the sun doesn't have the decency to be giving you the illumination you're looking for, you need "hot lights".
"Hot lights" are, in photographic terms, anything that isn't a strobe or the sun. Any normal, on-all-the-time light.
On the plus side, hot lights can be quite cheap, and they make it easy to see how your subject's lit without taking test pictures, and most people have a few lamps around the house already that can be pressed into service.
On the minus side, you need a lot of light for small-aperture photography.
Is it winter? Is it cold in your house? Have I got a lighting solution for you.
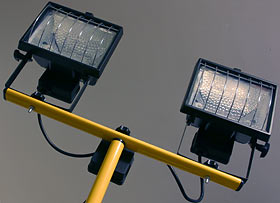
Cheap hardware-store 500 watt halogen "work lights" are the impoverished digital photographer's friend. Cure your SAD and warm your room, all at once!
(And, if you want to have a party in the back yard, you can use them to light it. Flashes aren't as useful for this.)
The above pair of 500 watters are on top of a telescopic steel stand with a tripod base; they're easy to aim, they use standard lamps that don't cost much, and they're Bloody Bright, by domestic standards at least.
Expect to pay $US70 or so for a serious, will-survive-service-in-a-commercial-garage version of this product. Expect to pay a lot less at your local discount store for the knockoff version of the same thing.
I bought a couple of dual-light stands for $AU57 each from my local fine merchandise emporium, and that included the bulbs. That's about $US75 all told, for two kilowatts of halogen goodness on sticks.
(You shouldn't ph33r my l33t bargain-hunting skillz very much, though, because the average lifespan of the provided bulbs was about two hours.)
Normal indoor night-time illumination is likely to be between 20 and 80 lux, but that's far too dim for small-aperture photography. Direct noon-time sunlight is around 100,000 lux, and the fact that we can see in that light level and by the 0.1 lux light of a full moon shows you just how wide the human eye's sensitivity is. Humans can look at a scene containing deep shadow and direct sunlight and see detail everywhere; film and digital cameras can't.
Indirect sunlight on a clear day is likely to be 10,000 to 20,000 lux. Overcast daylight will probably be around 1,000 lux.
(My light meter's limit, by the way, is 200,000 lux; it hits that reading with its sensor about six inches away from the filament of one of the 500 watt lamps. Just so you know.)
A thousand lux is a decent illumination level for hot-light product photography. For comparison, direct illumination from the four 275W heat lamps in my bathroom manages about 1400 lux at waist level, and about 600 lux on the floor.
(Yes, this does mean you could rig some kind of diffuser and use your bathroom as your photo studio.)
Anyway, in a room with a white ceiling of unremarkable height, four 500 watt halogens bounced off that ceiling will probably give you around 1000 lux on a tabletop. Rig more efficient reflectors on the lights, or do your shooting in a smaller white-painted room (an attic room with a low peaked ceiling can work very well) and you won't need as many watts.
You don't always want diffuse lighting. Some things need to be lit mainly from one direction only to display their peculiar optical properties. Usually, though, light-from-everywhere looks great.
Hardware store lights need to be colour corrected for film photography work, one way or another, because film has no "white balance" function. White balance is what lets you define the colour of your light, whatever it is, as being white, so you don't get yellow colour casts in all of your photos when you light your room with cheap yellowish lamps, like hardware-store floods.
Film photographers need to use filters on the lights, or a filter on their lens, or invest in whole new 3200-Kelvin-colour-temperature bulbs for the lights, which aren't cheap.
Digital doesn't care, though. Just set your white balance, or just use the auto setting and fix any residual error in post-processing if it's not too far off.
The less image correction you do altogether, and the further down the editing chain you do whatever you have to do, the better; practically everything you do to an image reduces the amount of information in it. But, for most purposes, you can get away with a lot with no significant quality loss.
If you've got the near-psychotic dedication to achieving the finest possible quality that afflicts many photographic enthusiasts, prepare to spend a lot more time making everything beautiful from square one.
Fluorescent lighting isn't out of the question, by the way. Cheap fluoros have lousy "colour rendering"; their "white" light is actually made up of the output of a three-phosphor coating that leaves big gaps in the spectrum. If you're photographing something that has parts whose colour falls between the fluorescent spectrum peaks, those parts won't look right.
"Full spectrum" or "daylight" fluorescent tubes, on the other hand, have a Colour Rendering Index of about 90 (sunlight and incandescent light score 100, even though the sun's spectrum isn't quite continuous), which is quite good enough. If you use tube lamps (as opposed to compact fluorescents) you get an instant "diffuser" effect from the length of the light source. A few fluoro fittings can give you a quite cool, high efficiency photo light setup.
Anyway, once you've got some decently bright lights and a tripod, you're ready to take small-aperture pictures.
Film photographers using hot lights in the studio have stands and reflectors and filters and barn doors and gobos and snoods a-go-go; you don't need all that stuff. All you have to do is make sure that the light illuminating your subject is all of the one colour.
Don't light something with overcast-sky-light through the window from one side and a hundred watt globe off a white wall from the other. If you do that, there's no way you'll be able to avoid one side looking much yellower than the other, and the Photoshoppery needed to correct the two sides of the object individually will be stupidly difficult.
If you're stuck with light that's to one side of your subject, put a reflector on the other side, not a different-coloured light.
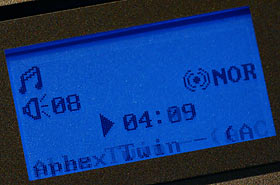
Another problem, not often encountered by most photographers, arises if the device you're photographing has stuff on it that glows. That stuff's appearance probably won't be changed much by the local illumination, so white balance correction for blue-ish window-light or yellow incandescent light or (if you must) greenish cheap-fluorescent light will skew the colour of the glowy parts.
In many cases, you can sidestep this problem by masking out the glowy part in your image editing program (if it's just a rectangular blue-backlit LCD display, for instance, then this should be easy) and colour-correcting it separately from everything else.
The old film-photography way of setting up lighting starts with consulting a good book on lighting, then setting up your various lighting widgets just right. Knowing about lighting will let you get it more or less right, but you can still spend an arbitrary amount of time tweaking to taste.
When you're shooting digital, though, you can just try everything. Your tweaking time becomes photographing time; like a well-heeled pro film photographer squeezing off zillions of Polaroids, you can trial-and-error your way to perfection.
Perspective
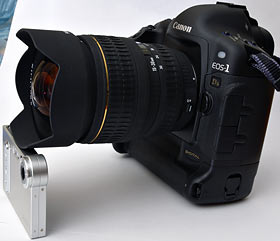
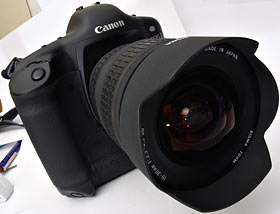
When you're shooting close up, you can get dramatic perspective effects. Use a wide angle lens close to your subject, and parts of the subject that're close to the lens will appear disproportionately large.
If you want a realistic portrayal of the subject, this is bad. If you want to emphasise the bigness of some protruding part, though, it can be just what the doctor ordered.
Take this shot of Canon's thrillingly expensive EOS-1Ds, for instance. It's wearing my own Sigma 15-30mm wide angle zoom lens (and resting its nose on a hapless Casio Exilim EX-S3 micro-cam).
The 15-30's a bug-eyed weirdo of a lens, whose character...
...can be more fully expressed in a big-perspective shot.
If you want to flatten perspective, you should shoot with more zoom, from further away.
Many people call this effect "distortion", but it isn't. If you look at the picture from close enough that it fills the same amount of your field of view as it would if you were really there, then the "distortion" disappears.
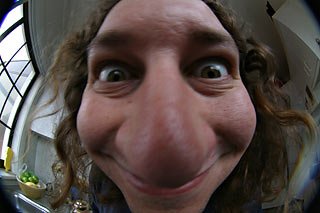
Fisheye lenses are different; their distortion is real distortion, and they show you more of the world than you could possibly see with your actual eyes.
On the subject of jazzing up the look of things - if you're photographing a boring object, try shooting it at a jaunty angle. This also avoids any problems with getting things lined up perfectly vertical; a photo shot three degrees off the horizontal looks wrong, but one that's tilted forty degrees is obviously meant to be that way.
Getting close
Gadget photography often requires you to fill the frame with an image of a small thing.
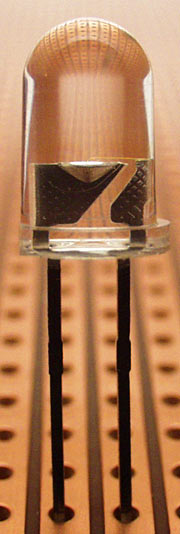
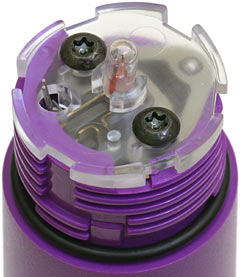
An LED, a cable-end, a chip, a baby-cam lens, the gearbox of a tiny toy tank.
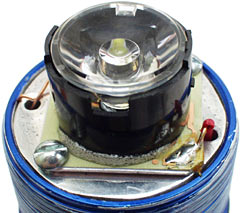
Or the lamp end of one of the zillion and three flashlights I've reviewed, at last count.
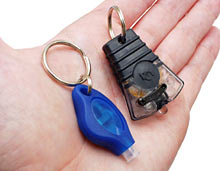
If you just want to show how small something is without showing it in amazing detail...
...then there's no problem.
Getting lots of magnification, though, can be tricky.
High-magnification close-up work is generally referred to as "macrophotography", or just "macro" work. Technically, it's not macrophotography if the image being cast onto the sensor inside the camera isn't as big as, or bigger than, the actual object you're photographing, but that's a quite arbitrary distinction. Especially when you consider that this definition means that if you use a digital camera with a sensor half the size of a 35mm film frame to take a picture, you also need to have half the field of view (twice as much magnification) to achieve the same macro ratio.
Hence: If it's a high magnification shot of something, probably taken with the camera quite close to the subject, it's macro work.
Fortunately, you don't have to mess around with weird accessories that make your camera look like a piece of Ghostbusting gear to get decent super-close-ups. Many digital cameras these days have OK macro modes, but some are really excellent. It's hard to find a camera in Nikon's Coolpix series that can't take stunning super-high-magnification pictures, for instance.
Ideally, a camera's macro mode should work well with the lens zoomed in, so you don't need to have the lens practically touching the subject to get high magnification.
If you do need the camera to be very close to the subject, you can forget about using forward-facing on-camera flash...
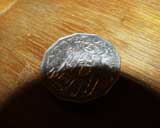
...because parts of the camera will cast a shadow on the subject.
Even using other lights can be tricky if you're practically grazing the subject with your lens barrel.
DSLR users can do great macro work with an appropriate lens, and that lens doesn't have to cost much. My 100mm Phoenix macro lens only cost me $US140. It's plasticky, has a hideously loud autofocus motor and doesn't always reset its aperture properly if it's pointing downhill, but it's optically excellent, and you can't complain for that price.
You can also get add-on magnifier lenses for a lot of digital cameras...
...or improvise.
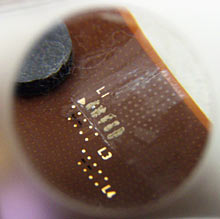
I took this shot through a little hand-held lens to illustrate how you were supposed to use a CPU multiplier unlocking kit (for this review), but extra magnification doesn't have to be this obvious; add-on "diopter" macro lenses (see some more here) can be used with integrated-lens digital cameras and with SLR lenses, and often work very well.
DSLR users can also use relatively cheap "extension tubes", which contain no optics and just attach between the lens and the body of the camera.
And you can use variable-length bellows as well, or get really tricky and mount a lens to a camera backwards, or even stack a reversed lens onto a right-way-round one. But such gymnastics aren't necessary for most purposes. Extension tubes, on the other hand, are worth talking about some more.
Extension tubes are an excellent way to turn a cheap lens into a very effective macro. "Cheap" here can mean as little as $US70; that's what my little Canon 50mm prime costs (it's $AU155 from m'verygoodfriends at Dirt Cheap Cameras here in Australia). The price of the extension tubes and lens between them may be more than the price of a basic macro lens, and the tube-plus-lens combo won't be able to focus on distant subjects, and there may be some quality loss - the complex multi-element design of modern lenses is all about correcting distortion and aberration, and quality lenses take into account the distances at which they're meant to be able to focus. Go closer than that distance, and the lens may not perform as well.
But this quality loss is often negligible, and you get more flexibility from a tube/lens combo. You can use the lens by itself (and focus to infinity all you want), and you can use the tubes with any lens. A long telephoto with a few "stacked" tubes behind it is great for high-magnification fairly-close photography of small nervous animals, for instance.
Extension tubes and add-on adapters both prevent you from focussing your lens to infinity, but they move its minimum focus distance closer. The more wide angle the lens is, the more drastic this effect will be - really wide angle lenses with even a short extension tube often end up with a minimum focus distance that can't be used, because the glass on the end of the lens gets in the way!
To be precise, the magnification factor you end up with when using a tube (or bellows) is equal to the length of the extension you're using, in millimetres, divided by the focal length of the lens on the end. 25mm of extension on a 50mm lens thus gives you 0.5X, or 1:2, magnification; the largest image the tube-plus-lens combination will cast inside the camera is one quarter the size of the subject.
At a magnification of 1:1 - the technical definition of true macrophotography - you could take a picture of a coin with a film camera, develop the film, then lay the coin on top of the negative, and it'd be exactly the same size as its image.
At 1:4, the image would be a quarter as wide as the coin; at 2:1 (macro ratios much higher than 1:1 are the domain of weird hyper-macros) the image would be twice as wide as the coin.
The closer focussing distance is what lets you achieve this high magnification. Here's an example.
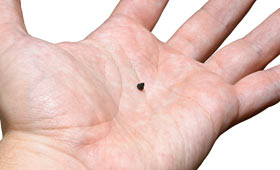
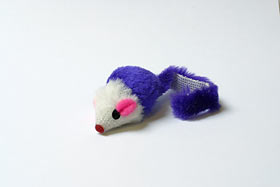
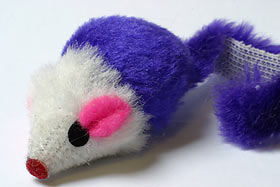
One lightly chewed rattly mousie, viewed through my 50mm lens (80mm-equivalent, on the D60), at its closest native focal distance - about 14 inches. The mousie's body, not counting its tail, is about five centimetres (two inches) long.
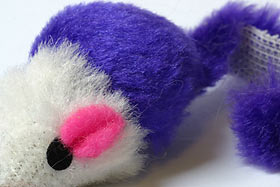
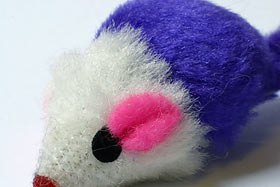
This was taken with my 100mm macro lens, without the screw-on 1:1 dioptre adapter that comes with it (this lens is only a 1:2 macro without the adapter, but hey, it's cheap). Again, this is about as close as it can focus - about 11 inches. Because this lens has a longer focal length, the image is much bigger despite the distance to the subject being only slightly less.
Here's the 100mm macro again, now with its screw-on dioptre adapter, which lets it focus at about five inches as well as increasing magnification.
And now, back to the 50mm lens, used with a 12mm extension tube. It can now focus at only six inches.
The 50mm lens, now with a 20mm tube. Focussing at about four inches, it's got a bit more magnification than the 100mm macro without its add-on lens.
The 50mm with a 36mm tube. Now it focuses at about three inches, and almost beats the 100mm macro with its add-on lens.
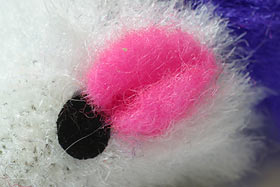
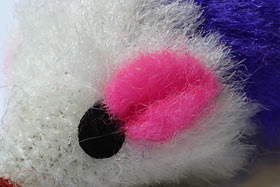
You can stack extension tubes, and for this shot I did. The 50mm lens now has all three tubes behind it, for a total of 68mm of extension and a 1.36:1 magnification ratio. Focus distance only about two inches.
Not to be outdone, here's the 100mm macro with its add-on lens and the same three-tube stack behind it. The magnification is less drastic, because the lens starts out with a longer focal length. But it still handily beats the 50mm, despite focussing at a more manageable four inches.
What's the down side of all this lens-extending? Light, again. Move the lens further away from the sensor and less light makes it to the sensor.
These shots were lit by a bit more than 400 lux worth of window light, which added up to some pretty lengthy exposures, since I had both lenses stopped right down to the smallest aperture they supported, resulting in f22.
With 68mm worth of extension tubes, the humble 50mm may get you considerably closer than the 100mm macro with its 1:1 adapter on can manage, but it needed an exposure 3.75 times as long to do it. The unassisted 100mm macro shots were four second exposures; the 68mm-extended 50mm and 100mm shots were fifteen second exposures.
With normal night-time indoor lighting, heavily tubed exposure times could fairly be described as "Saturday at f/8".
It's easy to get excited about the tininess of the smallest object your camera can blow up to fill the whole viewfinder, but you should also factor in the resolution of the camera. A 1600 by 1200 (1.92 megapixel) camera that can fill the frame with something two centimetres wide is less capable than a 3000 by 2000 (six megapixel) camera whose smallest macro field of view is three centimetres wide. Sure, the 1600 by 1200 camera's got more magnification when you're framing the shot, but it's only laying 800 pixels across each centimetre of the subject; the higher resolution camera's managing 1000. Crop a 1600 by 1200 rectangle out of the higher resolution shot and you've got more magnification.
That said, though, the macro performance of the better point-and-shoots is still very impressive.
I've mentioned Nikon's Coolpix line already, but it's worth saying that even the not-so-new Nikon Coolpix 990 and 995 can manage a 19mm wide frame, with 2048 by 1536 resolution. That field of view is up there with the 68mm-extended 50mm lens on my D60.
The older 1600 by 1200 Coolpix 950 can get marginally closer, but its lower resolution means the later cameras win. The current Nikon flagship swivel-cam, the Coolpix 4500, has about the same coverage as the 950, but 2272 by 1704 resolution. Not many gadget-photographers are going to need more macro capability than the Coolpix 4500 provides - ever.
<< Back to page 1 |
On to page 3 >> |
