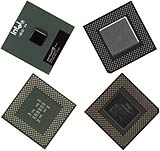
Getting up to speed with the P3V
Review date: 6 March 2000. Last modified 03-Dec-2011.
Intel is, at this moment, in the process of having a rather bad year. Well, at least as far as the PC motherboard and processor market goes. Intel's high-end Pentium III processors are decent performers, but you can't bloomin' buy them; the processor giant can't come close to meeting demand. A lot of buyers don't mind, because Advanced Micro Devices (AMD) will happily sell them one of their Athlon processors that'll match, or exceed, the performance of a more expensive P-III. You need a special motherboard for an Athlon - but you also need a special motherboard for some recent P-IIIs.
P-III models whose name ends with a "B" use the new 133MHz Front Side Bus (FSB) speed. Interestingly, it's also possible to run other P-IIIs, meant for the older 100MHz FSB, at 133MHz; Intel's relatively cheap 500E and 550E FC-PGA P-IIIs (the E indicates that they use the newer, more advanced, smaller and cooler "Coppermine" P-III core) are well known for being happy to run at 133MHz FSB, or even faster. This "overclocking" makes them, at 133MHz FSB, into 667 and 733MHz processors, respectively. It's a 33% speed-up for free.
But to do this - or to run any processor that's meant to use 133MHz FSB at its proper rated speed - you need a motherboard that can handle the speed. And it's here that Intel can't help you - well, not very well, anyway.
Intel's old i440BX chipset still powers a lot of current model motherboards. It was only meant to be able to handle 100MHz FSB, but enterprising engineers have made boards that run stably at much higher speeds - 133MHz is nothing to them. With good enough RAM, 150MHz is attainable. Speeds other than 66, 100 and 133MHz are non-standard, but there are lots of boards that let you set whatever FSB you like, cheerfully disregarding the FSB which the processor they're using is meant to have. Intel standard boards automatically determine what FSB and supply voltage a processor wants, and set it without user intervention, but manual control is where it's at for overclockers.
Really high speeds on BX boards, though, are not very useful.
This is because the PCI and AGP bus speeds in a computer are linked to the Front Side Bus by a handful of "fractional multipliers", and the BX chipset doesn't have the multipliers you need to run the FSB really fast without also running AGP really fast. The PCI bus is supposed to run at 33MHz, and BX boards designed to run at high FSBs have a 1/4 multiplier to keep it at the proper speed when the FSB is 133MHz. Many BX boards, though, don't implement the 1/4 multiplier. They only have the 1/2 and 1/3 ones, which set the PCI speed correctly for 66MHz and 100MHz FSB respectively, but higher than normal if you use speeds much above 100MHz. Various devices can't handle PCI bus speeds greatly above the stock setting.
With the 1/4 multiplier, the PCI bus isn't running unacceptably fast even if your FSB's been wound up to 140MHz and beyond. Without it, your PCI cards and hard drives (which share the PCI bus speed) may become unhappy at FSB speeds much above 120MHz.
Assuming a BX board has the 1/4 PCI multiplier, though, it will still only have a choice of 1/1 or 2/3 for the AGP bus speed. AGP is meant to run at 66MHz, and most AGP cards will tolerate a 20% or so overclock. But at FSB speeds much higher than 120MHz, your graphics card pretty much has to be a PCI unit. And you just can't get PCI versions of the hottest graphics cards. This means you may be able to run a super-fast CPU, but if you're doing it in order to play 3D games, you'd get better performance from a slower CPU and a faster, AGP, graphics card.
All you need to make 133MHz FSB useable with AGP cards is a 1/2 AGP multiplier. But to get it, Intel want you to buy motherboards based on their i820 chipset. The i820 at least pretty much works these days - early on, Intel had awful problems with boards that couldn't have all of their RAM slots filled - but it ain't cheap. The motherboards themselves can't be had for much less than $AU350, versus less than $AU250 for high quality boards using other chipsets, but that's not the real price problem. The real price problem is that the i820 wants to use new-fangled Rambus memory, which is easily three times the price of the plain Synchronous Dynamic Random Access Memory (SDRAM) everyone else still uses, and which doesn't look like getting a lot cheaper any time soon.
You can use plain SDRAM with various i820 boards - they have slots for it built in, or they use a special "riser card" adaptor - but it works through a "memory translation hub" which has been referred to as a "memory decelerator". You don't lose a ton of performance from the translator - the actual impact on system speed is about 5% to 15%, depending on what you're doing - but it's still not an elegant solution. There's definitely room for another competitor.
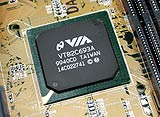
Enter VIA Technologies. Their Apollo Pro133 and 133A chipsets have all of the desirable features of Intel's attempts - Ultra DMA/66 hard drive support, 133MHz-and-beyond FSB speeds, 1/2 AGP multiplier and even support for the super-fast AGP 4X, in the 133A. But they don't need expensive RAM; for high bus speeds, they use the same cheap PC133 memory as older boards. They're not blazingly fast, mind you - at the same FSB speed, a system built on either VIA chipset will lose to an old BX system. But the difference is 10%, at most, and probably rather less.
3D game frame rate tests are the worst for the VIA chipsets, but even they usually show a performance loss not much higher than 5%. Since 10% performance difference is about the smallest you're likely to be able to perceive, this is not anything to worry about, especially when in exchange you're getting that precious 1/2 AGP multiplier. Once you can use an NVIDIA GeForce 256 or similar super-powered AGP graphics board, you instantly get a huge performance advantage - we're talking twice, or three times, the frame rate of the best of the current PCI cards, which are NVIDIA TNT2s or low-end 3dfx Voodoo 3s.
Various recent VIA chipsets, including the Apollo Pro133 and 133A, support another special kind of RAM - NEC's Virtual Channel Memory (VCM). VCM promises RAM speed improvements of up to 50% - which may or may not make a significant difference - but it has the advantage of not being a whole new kind of memory module, needing its own special connectors and RAM controller. The VIA boards can accept plain SDRAM now, with no performance penalty, and can also use VCM modules, when they become available.
Given that Apollo Pro133 and 133A boards sell for about the same price as BX boards, it's clear that Intel really don't have a lot going for them. An i820 board will be a bit faster if you give it Rambus memory, but with memory you can actually afford there's no performance advantage. So if you're shopping for a performance motherboard for Intel processors at the moment, the VIA chipsets are a good way to go.
The P3V pair
ASUS have something of a tradition of making surprisingly capable "basic" motherboards, and it looks as if they've done it again, with the P3V.
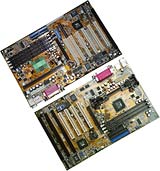
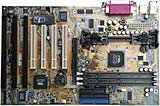
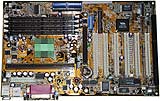
P3V133 at the bottom, P3V4X at the top.
There are two variants of the P3V, and I checked out both of them. The original P3V133 is built on the Apollo Pro133 chipset, and sells for $AU199. It's now been joined by the $AU229 P3V4X, based on the newer Apollo Pro133A chipset. There's not a lot of difference between the 133 and the 133A, but there is quite a lot of difference between these two motherboards, and the P3V4X is well worth the extra money.
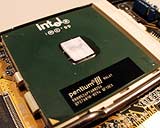
Both boards support all Intel Pentium II, Pentium III and Celeron processors. Slot 1 processors plug straight in, and you can connect Socket 370 processors by using a "slotket" adaptor board (I review a couple here). With an appropriate slotket, you can even use one of VIA Cyrix's new Cyrix III CPUs - though, based on early performance reports, they don't seem to be very interesting.
Setting up
Installing both motherboards is no harder than installing any other - if you're a beginner you're likely to find it rather alarming, but it's easier than it looks. Both boards are quite slim - normal ATX length, but not very wide - which makes it easy to fit them into any ATX case. ASUS' excellent documentation helps a lot.
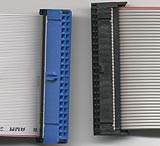
UDMA/66 cable on the left, plain IDE cable on the right.
When you connect two IDE devices to one IDE connector on a motherboard, you have to set one of them to Master and the other to Slave; the master drive's controller board then controls both drives. Hard drives normally come set to Master, and CD-ROM drives normally come set to Slave. More considerate manufacturers tell you how to change the settings with a sticker on the drive, so you don't have to dig up a little bit of paper if you need to change the setting in the future.
The P3V boards each come with one UDMA/66 cable. Most motherboards come with only one IDE cable, even though they've got two IDE connectors; at least this one comes with the high performance version. The 80 wire UDMA/66 cable will work fine with UDMA/33 and slower devices; the connectors are the same, it's just the cable that's different. The extra wires, by the way, are just interleaved earths, there to reduce noise.
If you're connecting both a UDMA/66 hard drive and a CD-ROM drive to one channel with the provided cable, your CD-ROM must use UDMA/66. Otherwise, the hard drive will be using the fastest transfer mode the CD-ROM drive supports. UDMA/66 makes little enough difference to hard drive performance, and none at all for CD-ROMs, but you might as well use it if you've paid for it; to isolate a CD-ROM drive that doesn't support the ultra-fast mode from your hard drive, just pick up another ordinary 40 pin IDE cable for the CD-ROM, and plug it into the second IDE socket on the motherboard.
Like many recent boards, the P3Vs let you use a CD-ROM drive in its stock, "slave" setting, even if it's the only device on a cable. The IDE standard says you're meant to have either a drive set to master on a channel, or one set to master and one to slave, but not a slave alone. But you can use a solo slave if you like, these days; it's such a common mistake that the motherboard industry's changed the de facto standard.
Again, like all recent motherboards, the automatic drive detection feature built into both of the P3Vs means you don't need to tell them what kind of hard and CD-ROM drives you've plugged into the IDE connectors. As long as you don't have two drives on one connector that are both set to master or both set to slave, you'll be fine, and you won't have to touch the hard disk detection page in the BIOS setup.
The only unusual thing you have to do after installing a P3V motherboard is remember to install the supporting "4-in-1" VIA driver package, provided on the accompanying software CD. The drivers make DMA Ultra hard disk access, AGP graphics cards, power management and PCI IRQ routing work properly under Windows 95-based operating systems, and there's a handy readme file displayed by the installer that tells you what the heck's going on. The installer also lets you individually pick which drivers to install or uninstall.
The P3V133
The P3V133 has OK specs, for a basic Slot 1 motherboard. It's got one AGP slot, four PCI slots and three ISA slots, so it's suited to people who are upgrading from an older machine and have some ISA expansion cards they're not ready to trade in on PCI versions yet. It's got three sockets for standard SDRAM Dual Inline Memory Modules (DIMMs), up to 256Mb each. And it's got a pair of Ultra DMA/66 IDE drive connectors, so you can use the latest cheap high performance drives at tip-top speed.
It supports 16 FSB speeds from 66MHz to 150MHz, and most of them are actually likely to be good for something - although, with only the usual 66, 75 and 83MHz speeds below 100MHz, it's no better for Celeron overclocking than dozens of other motherboards.
Celeron overclocking
Intel's low-end Celeron processors run as fast as a Pentium II at the same clock speed, for all desktop computer tasks. And pretty much all Celerons are happy to run faster than their stock speed, if you've got a motherboard that lets you twiddle CPU settings manually. But the Celerons, like all Intel CPUs for quite a while, have a "locked multiplier" - they run at a set multiple of the Front Side Bus (FSB), and you can't change it. To run them faster, you have to increase the FSB.
The stock FSB for all Celerons up until now - and for a little while in the future - is 66MHz, which is supported by all Pentium II compatible motherboards. Intel will shortly be releasing Pentium III based Celerons, which will essentially be the same as the current FC-PGA P-IIIs, and use 100MHz FSB. But the P-II based Celerons are all 66MHz.
A motherboard whose next three FSB speed steps after 66MHz are 75, 83 and 100MHz can, therefore, overclock a meant-to-use-66MHz Celeron by 12.5%, 25% or 50% - if the Celeron's core can handle it. Old 300MHz Celerons, with their 4.5X multiplier, often run fine from 100MHz. No extra cooling, no CPU voltage twiddling, no muss, no fuss. Newer, faster Celerons have higher multipliers and run closer to the core's maximum capability, though. A 466MHz Celeron, for instance, has a 7X multiplier. It will probably endure 75MHz FSB, might perhaps tolerate 83MHz with extra cooling and a higher core voltage setting, but definitely won't work at 100MHz without, at the very least, outrageous active refrigeration.
Motherboards with lots of sub-100MHz FSB speeds let you tweak a high-multiplier Celeron up to its maximum performance. Most overclocking boards, though, don't give you many appropriate speeds. Abit's BF6, for instance (reviewed here), lets you set the FSB to 66MHz, 75MHz and any speed from 83MHz to 200MHz, in 1MHz increments. This is less than ideal for overclocking high-multiplier Celerons, that won't even tolerate 83MHz. A better choice is a Celeron-specific board, like Abit's hugely popular dual-Celeron BP6, which offers five extra settings between 66MHz and 83MHz, and lets you build a dirt cheap dual-processor system for Windows NT, Windows 2000 or Linux use - or just use one processor, if you like.
The last little bit of tweakability, of course, scarcely matters - you won't be able to pick the difference between a 533MHz processor and a 550MHz one. But if you're planning to play with a Celeron, you might as well get a motherboard that's made for it, and grab another few per cent. Who knows, you might have a Celeron that'll play Quake 3 for weeks on end at a 22.5% overclock, but won't tolerate 25%; without a motherboard that lets you set that speed, you'd never know.
You set the CPU and related configuration settings on the P3V133 with good old fashioned little plastic jumper blocks. None of yer pansy, convenient software CPU speed configuration; you do it with little plastic blocks stuck onto pins on the board, like a real man.
If you have to muck about with them all the time, jumpers are a pain, but the ASUS manual explains what jumpers do what very clearly, and if you're not clowning around with your CPU speed you'll only have to change the settings once.
You don't, strictly, need to bother manually setting the multiplier, if you can tolerate a wrong CPU speed display every time you boot the computer. Only if you're using an CPU without a multiplier lock - earlier P-IIs, basically, although the Cyrix III will apparently also be unlocked - does this setting actually matter.
The P3V133 also gives you full manual control over the PCI bus multiplier, which is a somewhat unusual feature - most motherboards just set the PCI multiplier to whatever setting the board thinks is appropriate for the FSB you've picked. This can be annoying when you're overclocking - if you're running 125MHz FSB, you probably want the 1/4 PCI multiplier. This "underclocks" the PCI bus by 6% or so, but that has no real impact on performance, and will give you a more stable system than sticking with the 1/3 multiplier and overclocking the PCI bus by 25%. If your motherboard won't click over to 1/4 until you set it to at least 133MHz FSB, though, then you're out of luck. The P3V133's manual control lets you pick 1/2, 1/3 or 1/4 whenever you like.
The P3V comes set up for a 133MHz processor, which means it's using 133MHz FSB and the 1/4 multiplier for PCI speed. The manual reminds you to change your PCI speed multiplier to match the FSB you set. If you're a dummkopf like me and just wind the FSB speed down to, say, 66MHz, to do a test power-up with your old standby Celeron processor, you'll be trying to clock the PCI bus (and the hard drives...) to half of the correct 33MHz. Your computer will thus do a brilliant imitation of a paperweight until you stop telling large parts of it to move at the speed of continental drift.
The Pro133 chipsets also let you run your RAM at a speed different from your FSB; you change the setting in the BIOS setup program, accessed by pressing Delete during startup. SDRAM on the shop shelves these days is rated as "PC100" or "PC133", indicating the speed it's meant to run at; older P-II and Celeron systems may have PC66 RAM. Most RAM can handle speeds a fair bit above its rating, but with the Pro133 "asynchronous" RAM feature you can quite confidently use a 133MHz FSB, or maybe 140MHz or more, with older PC100-rated RAM. The P3V133 only lets you run your RAM slower than FSB, with a 2/3 multiplier; this is fair enough, as winding up the RAM speed above FSB makes, to use a technical term, bog-all difference to system performance.
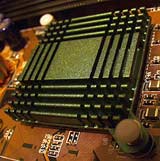
Despite the fact that the P3V133 can use very high FSB speeds, ASUS decided to ship it with no heatsink on the main motherboard chip. There are mounting holes for a standard-issue low profile heatsink, but one isn't included. In testing, the chip got quite toasty at 140MHz FSB, so I decided to do something about it.
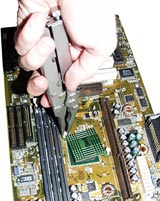
Here's me pinching the heatsink from an old, dead ASUS board. These green-anodised heatsinks are found on all sorts of motherboards, and it shouldn't be too hard to find one, or an equivalent.
In case you're wondering about the funky implement I'm using in this picture, it's a Kershaw A100C Multi-Tool. It was the first pocketknife to incorporate Vise-Grip-style locking pliers, although the Leatherman Crunch has them now, too. Both can be had from any decent camping goods store, even here in backwards little Australia. If you're looking for a good on-line place to feed a pocket-knife fetish, try the KnifeCenter of the Internet. Their site could be more elegant, but they've got pretty much everything.
These sorts of heatsinks are retained by spring-loaded nylon split pins, which look as if you're meant to remove them by pinching the end together on the other side of the motherboard (which is impossible, when the motherboard's mounted in a case...), and then lifting the pin out.
The heck with that. Just grab 'em with pliers and yank, and they pop free with no damage. Well, they always have when I've done it. If you stick your pliers through the motherboard or set fire to your beard or something, I'll tell the cops you're just that crazy person that's been stalking me.
It's actually not a bad idea to lift the heatsink on any board that comes with one, because you'll probably find there's no thermal transfer compound, a.k.a. "heatsink grease", under the thing.

When a cheap heatsink, which is not perfectly flat, is held fairly loosely by little spring-pins against an also not perfectly flat chip like those on motherboards, there's actually quite a lot of tiny air gaps between the sink and the chip, and not nearly as much heat gets moved as you'd like. Many heatsink devices come with some sort of stick-on rubbery transfer stuff stuck onto them, and that's fine for low performance situations like this, but if there's nothing there, you'll be wanting some grease.
Heatsink grease is very inexpensive, and a tiny tube is enough to do dozens of chips. Apply it with a finger (it's quite inoffensive stuff), in a very thin layer
To tell if you've got enough grease on the chip, just press the heatsink down on top of it, lift it off, and see if there's grease stuck all over it. Anywhere there's a gap, add a little more grease, and repeat the press-and-peek routine until you've got contact all over. The aim is not to lubricate the joint - if the heatsink moves around smoothly, without the aluminium grating on the chip-top underneath, you've used too much grease. You want to feel some friction.
The quick and dirty way to evenly reduce an over-thick coating of grease is to simply press your heatsink into place, pull it off again, and wipe it clean. Heatsinks are easy to scrub clean with a paper towel; scrubbing chips can spread grease all over the motherboard.
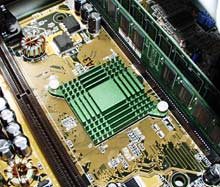
Popping the retaining pins back in place is much easier than removing them.
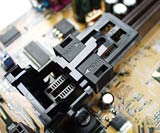
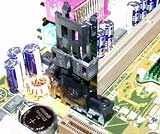
The P3V133 has a folding CPU retainer, which affixes to the board with an expanding split pin arrangement. The pins are a bit tricky to lock in place properly - make sure the centre pin's been pushed all the way in - and the hinged design means the whole retainer's a little wobbly. There are sliding latches on the side to lock the processor in place. I've seen plenty of crummy CPU retainers, and this isn't the worst of them, but it's still not my favourite way to retain a CPU if it's got a big fat cooler hanging off it. Big fat coolers, needless to say, are de rigeur for overclockers. Keep reading and you'll see a doozy.
The P3V4X
The P3V4X's Apollo Pro133A chipset doesn't, by itself, give it many features the P3V133 doesn't have. The main advantage of the 133A is AGP 4X compatibility; it lets you use the latest AGP graphics cards at absolute peak connection speed, with a theoretical transfer bandwidth of more than a gigabyte per second. In practice, though, AGP 4X doesn't actually give you much of an improvement over 2X, which is supported by the P3V133, or even the base 1X speed. If your video card doesn't have enough memory to handle all the textures a game or other application's throwing at it, then AGP 4X's really fast access to the computer's main memory ought to make your frame rate less awful. In practice, though, no PC can yet deliver data to the graphics card as fast as AGP 4X can accept it; a bit more data can be moved in 4X mode than in 2X, but the difference is slight.
AGP 4X may make a significant difference when games get a lot more complex and main memory speeds are substantially higher. At present, it shouldn't be a selling point.
The P3V4X has, however, plenty of other features that put it ahead of the 133. First and foremost, it's got software CPU setup.
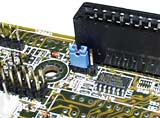
There's a block of DIP switches on the board that let people charged with assembling a lot of PCs set 'em up quickly...
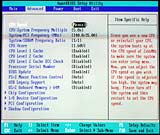
...but there's also a jumper which, in its default position, makes the DIP switches do nothing and lets you set up the CPU configuration in software. If you're twiddling your CPU speed, software setup is ever so much more civilised than flicking little weeny switches or shifting fiddly little jumpers; you just hit delete during startup to get to the BIOS setup menu, and configure your CPU speed, and voltage, there.
The P3V133 has voltage adjustment, but only via one pair of jumpers. One jumper lets you boost the CPU core voltage, and the other boosts the I/O voltage for the RAM, motherboard chipset, AGP port and CPU I/O buffer. Both of these may help you overclock a recalcitrant system, but with only one raised setting, there's not much finesse.
The P3V4X has software voltage adjustment, allowing you to change the voltage in 0.5V steps for the few tenths of a volt above the 1.6V that Coppermine P-IIIs use, and in 0.1 volt steps for the higher ranges.
Whenever the P3V4X thinks something's amiss, it'll set the FSB back to 66MHz for the next startup, and take you automatically to the CPU setup menu in the BIOS configuration utility. So if you wind the CPU speed up too far and leave the computer unable to boot, all you have to do is turn it off and back on again. All software-setup motherboards have a feature like this, to stop you painting yourself into a corner, but they generally require you to hold some special key down during startup or just cycle the power a few times; the P3V4X makes it automatic.
Mind you, it might make it a bit too automatic for your tastes; startup anomalies having nothing to do with the processor will still leave you staring at the CPU setup menu on the next boot. If you're into overclocking, though, and especially if you're a newcomer to the sport, then this is the friendliest system I've seen.
With the software setup, the P3V4X gives you access to 32 FSB speeds from 66 to 166MHz. It's stable enough that its eight higher-than-140MHz FSB settings may even be good for something. Mind you, 166MHz is a 25% overclock, which may be more than your AGP card wants to know about, even with the 1/2 multiplier the P3V4X will automatically apply.
The P3V133 gives you manual control over the PCI bus multiplier via a jumper block, but doesn't let you manually change the AGP multiplier - it just picks the one it thinks is appropriate for the speed you're using, so you can't underclock for stability. The P3V4X gives you manual control over the AGP bus multiplier, but not the PCI multiplier, if you use its hardware setup DIP switches. If you use the P3V4X's software setup mode, you can control the PCI multiplier manually, but not the AGP multiplier. All of this makes these boards a little less flexible for overclocking.
Like the P3V133, the P3V4X supports only 16 FSB speeds, if you use the manual setup. Whether you use hardware or software setup, you can use got 66, 68, 75, 80 and 83Mhz speeds below 100MHz, making it a bit more useful for Celeron overclocking; with software setup, you also get 85, 90 and 95MHz speeds.
The P3V4X has only one ISA slot, so owners of up-to-date hardware don't have lots of pointless old-fashioned slots taking up space newer ones could occupy. Six PCI slots give you lots of room for expansion cards.
There are several other nice touches.
For a start, the P3V4X actually comes with a main chip heatsink. There's no grease under it, though; I added some. If you don't live somewhere really warm, though, you'll probably get away fine without bothering to do it.
The P3V4X also has a better CPU retainer than the P3V133. The rails don't hinge, so they're more rigid. And they have expanding pins to hold them in place, but they're a much better design, with flat locking pins that click easily into place, instead of forcing you to engage in a trial of Human Versus Polymer as you try to squish too-small pins into holes. The sliding latches are the same as the P3V133's; they have a tendency to pop off the rails if you move them too far, but they're easy to replace and work well when used as designed.
You can do asynchronous RAM speed twiddling with the P3V4X, and it does more than the P3V133. The option the BIOS setup gives you changes with the FSB setting you've set. If your FSB is between 66MHz and 100MHz, you can run your RAM faster. From 100 to 124MHz, you can run the RAM faster or slower than the FSB. Above 124MHz, you can run the RAM slower than FSB.
As with the P3V133, this is not really a very useful feature. Winding down the RAM speed may let you hit really outrageous FSB speeds, or stick with your older, slower RAM, but winding up the speed won't make any real difference to system performance.
Fiddling with the RAM speed didn't help in my case, though. Nothing very much over 140MHz worked with the 500MHz Coppermine CPU I was using, no matter what memory multiplier I used. 142MHz seemed stable enough at the default 1:1 multiplier, but 146MHz failed with any multiplier I tried. Of course, 142MHz gives you less than 1.5% more CPU speed than 140MHz, and less than 7% more than 133MHz; if system stability is important to you, just remember that speed increases of 10% or less are, generally, not noticeable, and stick to a lower speed. A lot of overclockers are excitable teenagers without much of a head for figures; if you're past that stage, I suggest not seeking the absolute bleeding edge maximum speed for your processor. Backing off a bit will give you a computer that's less likely to crash on hot days.
Monster memory
The P3V4X also has much higher RAM capacity than the P3V133. It's got four SDRAM slots, versus the three on the 133. It can also handle 512Mb memory modules in all of those slots, versus the 256Mb ceiling of the P3V133. If you're a 3D rendering person, or need bodacious amounts of RAM for some other purpose, then the 2Gb RAM capacity of the 4X ought, I think, to be adequate for you.
Realistically, not many people buy modules bigger than 128Mb yet (even 256Mb modules aren't yet on the shelves at most retailers - never mind 512Mb). A more likely use for the four slots is installing your old 32Mb and 64Mb memory modules; if you've got, say, two of each, you can install the lot and not have to try to trade one in on a bigger module.
Some kinds of memory, for instance the low cost Kingmax PC133 modules commonly available today, may not work at high FSB speeds if the RAM's installed in the memory slot furthest from the processor, and the other slots aren't filled too. If you populate all four slots, everything ought to be fine; if you don't, you may not be able to use these cheap memory modules unless you mount them in the slots closest to the processor. Why wouldn't you use the slot closest to the processor? Why, because you've got an enormous CPU cooler that gets in the way, that's why!
CPU cooling
Coincidentally, right in the middle of my testing of the two P3Vs those wonderful folk at Alpha sent me their latest high-zoot ooh-baby Socket 370 CPU cooler, the poetically titled PEP66U.
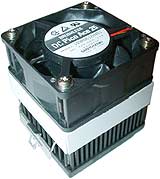
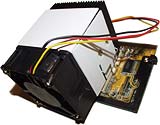
The PAL6035MUC - not the cooler to use with a Coppermine P-III on a slotket.
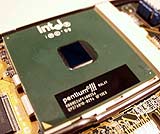
When I first got a Coppermine P-III to play with, I chose to cool it with another Alpha unit, the PAL6035MUC. This monster's poorly suited to Coppermine-on-Slot-1 setups, though; Alpha now specify in their on-line catalogue that you're meant to use it only with Celerons.
Coppermine CPUs have a much smaller top area than Celerons, so the PAL6035's flat baseplate tends to wobble atop the CPU. You need to shim one end of the cooler with something to keep it level. And the PAL6035's huge heatsink and top-mounted fan are fine if you're mounting it on a Socket 370 motherboard, so it stands vertically, but they're a royal pain if you're mounting it on a slotket in a Slot 1 board. The behemoth cooler overhangs so far that it fouls the RAM sockets, and all of that offset weight's no good for the CPU connector.
I got around the problems by shimming the edge of the baseplate with a bit of cable tie and replacing the high-powered Sanyo Denki fan the Alpha comes with with a weedy stock Intel fan unit, but I felt as if I'd just used a ray gun as a club. It was a solution without honour or elegance.
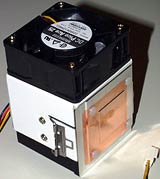
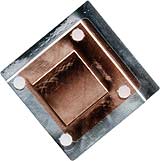
The PEP66U is different from the PAL6035. It's made for Coppermines, and for slotkets. It's got a heat spreading copper base to its aluminium heatsink, just like the PAL6035, but this one's specially sculpted, and has little plastic standoffs in the corners to make sure it perfectly mates with a Coppermine, without squishing the middle of the CPU or tilting under strain.
There's also a rebate on not one, but two edges of the base plate, so it neatly clears the step at one end of the CPU socket, and the engagement lever on the side.
Alpha have a new "FC-PAL35U" cooler on the way that's like the PAL6035, but with this new base plate. But since it's still got the same top-fan, excess-height problem as the PAL6035, it's still meant for vertical mounting on proper Socket 370 boards.
The PEP66U's design is different. The heatsink is much taller than the PAL one (which is the one on the right, in the above picture), and it bristles with thin, flat fins, versus the hexagonal pin-fins on the PAL. And the PEP66U's fan works sideways. When mounted on a slotket, with the motherboard horizontal and the CPU vertical, the fan points straight up, and the whole assembly's not as likely to foul the RAM sockets as the PAL cooler.
Groovy.
As with the PAL6035, a folded metal shroud lets the fan suck air over as much of the fin area as possible, and gives the cooler the stunningly low thermal resistance that overclocking aficionadoes have come to expect from Alpha products. Actually, it's even better than the PAL6035MUC; the new cooler scores (according to Alpha) 0.35 degrees Centigrade per watt, while the old one gets a mere 0.37.
What this means, in English, is that if your CPU pumps 20 watts of heat into its cooler, either of these units will only be about seven degrees above the ambient temperature. In Physics-Experiment-Land, where ropes don't stretch, pulleys have no friction and cows are perfectly spherical, this means your CPU core gets to run at only seven-and-a-bit degrees above ambient too.
In the real world, the CPU will be considerably hotter, because the core doesn't perfectly transfer its heat to the cooler. But it'll still be as cool as all but the craziest overclockers need it to be, unless the air around the cooler is hot because your case ventilation stinks.
Unlike many Japanese manufacturers of Computer Gear For The Mildly Deranged, Alpha's prices are not excitingly high. The list price for the PEP66U is a mere $US37.10. Now, this is exclusive of shipping and whatever taxes, duties and imposts you may have to pay, but it's still not outrageous.
Part of the reason for the low price is that Alpha coolers arrive as a box of bits. All you need to assemble them, though, is a screwdriver and the ability to read. The instruction sheet makes assembly easy.
Mounting any Alpha CPU cooler is simplicity itself, thanks to the handy two-part clip they include. The harder a CPU cooler clip clamps the cooler onto the processor, the better the cooler will work.
Simple medium tension spring-steel designs, though, are commonly right buggers to actually attach to the CPU socket. Some other clips are so super-springy that they're not just practically impossible to attach, but also clamp so hard that they actually distort the CPU socket. All of those weeny solder points that hold the socket to the motherboard or slotket are, together, very strong indeed, and so these super-clips often work fine - but that doesn't help the newbie installer who's sure that must not be how it's supposed to look. The Alpha clips are medium-force devices, but easier to attach than many cheapo low-force designs.
Before you do it, of course, you need to grease the top of your CPU. Since the top of the Coppermine is exceedingly flat, and Alpha coolers are machined so flat they make most heatsink bases look like the Swiss Alps, you only need the merest smear of grease.
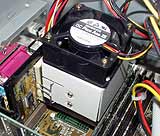
Once it's clipped on, the Alpha-cooled processor and slotket assembly will, I think, pass most tests for butchness. Yes, there is a processor in there somewhere!
Presto - one humungo-cooled CPU, in place and ready to rock. And it clears the first RAM slot.
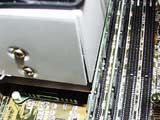
Well, it kinda clears it.
Actually, the edge of the heatsink touches the first RAM module. Talk about your fine tolerances.
This is not, actually, a problem; the heatsink only touches the top of the RAM chips on this double-sided module, so the are no electrical problems, and there's enough give in both the CPU and the RAM slots that even if you cart your computer around there's little chance of damage. And it certainly makes clear that you've just installed precisely the biggest CPU cooler you possibly could.
If the contact bothers you, of course, there's nothing stopping you taking to the edge of the PEP heatsink's pins with a chunky set of side cutters and removing the offending extra couple of millimetres of aluminium. Doing this would make no significant difference to the cooler's performance.
The P3V boards have about the same clearance from the CPU slot to the first RAM slot, despite having different numbers of RAM slots. Many other boards have RAM that's rather closer to the CPU; on the Abit BF6, for instance, the PEP66U still fouls the nearest RAM slot. This, as mentioned above, may be a problem if you use cheap RAM and high FSB speeds, since the outer slots can work poorly if the inner ones don't have RAM in them.
What's the point?
Whether you need a huge cooler like this for a Coppermine CPU is open to debate. The Coppermines are Intel's lowest heat output desktop CPUs, by a wide margin. The Thermal Design Power (heat output) of the Coppermine P-III 500E, running at stock speed, is a mere 16.1 watts, versus 28 watts for the previous model P-III 500.
But the cooler your CPU runs, the faster it can run. If the CPU puts out less heat, well and good - that means a given cooler will help it even more. And CPU heat output increases considerably when you goose up its supply voltage and speed - although the Coppermine P-IIIs have, thus far, demonstrated that even when drastically overclocked, they're still much cooler chips than anything else with the same performance, definitely including AMD's current model Athlons.
All of this heatsink blather isn't, actually, only relevant to overclocking nutcases like me. High quality CPU coolers are not a bad idea for anybody running a computer that they need to be highly reliable. Serious servers can sound alarms and even shut themselves down if, say, a case fan or two fails or some schmoe jams a box against the vents, and the internal temperature gets too high. But many people have computers that are as important to them as a serious server is to a big company, but can't afford actual high quality fault detecting hardware, or staff to monitor the machine.
With a really efficient CPU cooler, your poor server may be able to soldier on; a passive cooler like the Alpha can't make your CPU any cooler than the ambient temperature, but it can get it surprisingly close to ambient. Current CPU cores can keep working just fine at very high temperatures - if your core's kept below about 80 degrees Centigrade, your processor will probably keep on trucking - and if that means your small business's dial-in server keeps working over the weekend when the work experience kid stuck a pencil in its PSU fan before leaving, so your sales person can file that order right now and impress the big-shot he just met on the golf course - well, there's the price of quite a lot of Alpha coolers, right there.
Performance
The P3V4X has found itself the subject of a bit of debate, lately, on the subject of its crummy benchmark results in some games. Well, in some games, with some video cards, when tested by some people; different testers get different results. It always gets perfectly good results in simple system benchmarks, but in one demanding 3D test or other it performs very poorly. Usually. Some people don't find any problems at all.
If you believe big-name hardware reviewer Anand Shimpi, however the problem manifests itself, it's happening because the P3V4X locks the CPU In Order Queue Depth setting to 1, versus the usual setting of 4. This may help system stability, but it substantially hurts performance in games. Anand's 3D game performance test put the P3V4X at only about two thirds of the 3D performance of the fastest Apollo Pro133A boards, and maybe three quarters of the speed of most of 'em.
There's actually, apparently, quite wide variation in the 3D game performance of different 133A boards, which is odd. Normally, motherboards with the same chipset and basic feature set have functionally identical performance.
Other reviewers, though, found the P3V4X slow for different things, and some found no serious problems at all. I'm discounting, here, the reviewers who judge a 2% difference to be an earth-shattering discovery.
When I tested the P3V4X myself, it seemed fine - quickie tests with WinTune actually put it a hair faster than a BF6, when using a PCI Voodoo 3 video card (chosen to make high speed CPU comparisons with the BX-chipset BF6 possible).
When I tested it with Quake 2, it again clocked in the same as the BF6 - except, bizarrely, for one test demo, called "Crusher", which exists to provide worst case scenario results. Crusher has lots of people running around and shooting like crazy on a level with a large, fairly open area, so there's a lot more geometry going on than in the usual rooms-and-corridors environment where you're not likely to see more than three or four opponents at once. For Crusher, the P3V4X repeatedly scored less than half the frame rate of the BF6 with the same CPU, RAM and video card. Everything else was fine, but Crusher was amazingly slow.
To confuse things further, hardware super-test program SiSoft Sandra says the In Order Queue setting for the P3V4X is 8, not 1. Mystifying.
Others have speculated that performance oddities with P3V boards and AGP cards have to do with which version of the special VIA 4-in-1 drivers you're using. The 4.17 drivers, on the included CD, are the ones to go with; the newer 4.20 driver set hurts AGP performance. Usually, newer drivers are better. Not this time. The VIA driver download page is here; if you get a P3V or other Pro133 or 133A board, keep an eye on this page for post-4.20 drivers.
If the 4X's low performance is indeed caused by a simple CPU setting, then a BIOS update can fix it. There's a beta BIOS update out for the P3V4X; you can get it here. But it doesn't help game performance.
The uneven test results make clear that it's by no means guaranteed that game performance from the P3V4X will be any worse than it ought to be. If it's only super-detailed scenes that cause it, many gamers may never notice it. But even if you get 30% less performance than you ought to, you're still not going to have bad results; the P3V4X will still give you bad-ass frame rates with a GeForce in 1024 by 768 while you wait for the BIOS update that'll fix whatever the heck this problem is, so you can get SUPER-bad-ass frame rates.
Which to choose?
For your extra $AU30, the P3V4X gives you a lot more power. It's a quite different motherboard from the P3V133. If you've got only one old ISA card - or none at all - the P3V4X gives you more room for your newer PCI hardware, and if you want to overclock, there's no contest.
At 1.7 volts, my Coppermine P-III was as stable at 700MHz on the P3V4X as it was on the BF6. But the P3V4X lets you run the CPU at that speed and a GeForce 256 (at AGP 4X speed, no less), giving game speed easily twice that of any currently available PCI-based video system.
The Apollo Pro133 and 133A aren't perfect, but they're the best option for people who want to run Intel processors at 133MHz FSB or faster, at the moment. Intel's own mainstream 133MHz FSB offering is hobbled by its own price and the price of the Rambus memory it needs for full speed operation.
