Lightspeed IP Sharers
Review date: 18 November 1998 Last modified 03-Dec-2011.
Sharing a single modem between computers for Internet access is tricky. It can be done with proxy server software like Wingate, but this requires the proxy machine to be on whenever you want to use the Net. You can also do it by setting up a Linux server and TCP/IP networking, but this requires knowledge of Unix and a whole separate computer to be the server - an old 486 is perfectly adequate, but this is still well above the amount of commitment that the average small business or home user is willing to invest.
The Lightspeed IP Sharer solves the problem quickly, simply and quite cheaply, too. You don't need an extra computer, you don't need to be a UNIX guru and you don't need to spend any more than $330 or so, the retail price of the unit (Australian dollars). It plugs into your network, and into your modem. Whenever a computer on the network requests Internet data, the Sharer dials in and presto - your network is on the Net, and everyone can share!
What you get
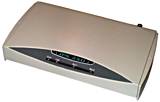
The IP Sharer is a box about the size of two packs of cards side by side. It comes with a plugpack for power and a serial programming cable - which you probably won't have to use - and it's got a nine pin serial port on one side to connect to the modem and 10Base2 and 10BaseT connectors on the other side. There are a couple of DIP switches to select programming mode - which, again, you probably won't have to touch - and two status lights on top, and that's it.
You also get a perfectly adequate little manual, which will win no prizes for looks but which tells you everything you need to know, in plain English.
Setting up
Getting the IP Sharer going is only a little more complicated than connecting a single computer to the Internet. You need to tell the Sharer your dial-up information before it can connect. You can do this by setting the two little DIP switches to programming mode and connecting the Sharer to your computer with the special programming cable. You then use a terminal program to access the Sharer like a little bulletin board, and you can page through different text configuration screens to set everything up. This lets you change the IP address of the Sharer before connecting it to your network, so you can line it up with an existing IP address scheme instead of using its stock 192.168.0.1 address. But if you don't need to do that (and you probably don't), there's a much groovier way to do the setup.
Network ports and a power connection on the back...
...and a serial port on the front. That's about
it!
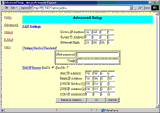
Simply take the Sharer out of the box, connect it to your network (it connects just like any other device to 10Base2 or 10BaseT networks, and automatically detects what kind of network you're using), power it up, run a web browser on some other machine on the network and look at http://192.168.0.1. The Sharer has a collection of neat HTML forms which it will happily deliver this way, and setting it up is about as tricky as ordering a book from Amazon.com. These days, most people don't even have a terminal program on their PC, but pretty much everyone's got a Web browser.

The HTML-based setup system is marvellously easy
to use.
Whichever setup procedure you choose, you have to tell the Sharer your username and password, your ISP's phone number and DNS numbers, what kind of modem you have (its list didn't contain my Banksia modem, but the suggested plain Hayes Compatible setting worked perfectly), what speed to set the serial port to, and so on. If you've ever set up ordinary single-user Internet access, none of this will be new to you.
If your ISP uses standard PPP logon procedures (no manual username and password entry), this is all you need to do for basic Internet access. If you need to use a script to log on - or if your normally log on by manually typing in your username and password - the Sharer will need a logon script. You enter this via another simple HTML form. The scripting language is very straightforward, well documented in the manual, and just as easy to use as Dial-Up Scripting in Windows 98.
Once you've fed the Sharer this basic information, you have to set up the other computers on the network to look to it for Internet access. They'll need to have TCP/IP installed - Windows 95 setup is specifically addressed in the Sharer's manual. The Sharer can act as a DCHP server, so you can set other computers on the network to be assigned an IP address by it, and that's all you need to do to make it your Internet gateway. If you don't want to use its server abilities, you can turn them off, set your own addresses or use a different DCHP server, and manually set the Sharer as a gateway on all connected machines.
Once you've done all this, any computer that tries to access the Internet will automagically cause the IP Sharer to dial out and connect, whereupon your network will be connected for as long as you like. You can set the Sharer to automatically disconnect after a given idle period, or you can tell it to stay connected indefinitely.
Extra features
This is not the end of the IP Sharer's talents. You can set a password so that unauthorised persons can't go to 192.168.0.1 and start monkeying with your settings. This is an especially good idea if you're using a logon script, because your username and password are just sitting there in plain view, and without a password on the Sharer anyone on your local network could assume your online identity.
The Sharer also supports email account sharing - it can handle up to four separate email accounts, and up to 50 users, each of whom can be set up as an "alias" for a given email account. They piggybacking their identity onto the front of the displayed name on messages, while leaving the actual email address the same. So, for example if Joe Bloggs wants to share Fred Smith's "fsmith@foobar.com" email address, he gets his own email logon name and password, and his email could be sent from "Joe Bloggs<fsmith@foobar.com>". Incoming mail directed to his address is magically sent to him by the Sharer when he logs on. This system isn't perfect, as anything that strips the alias off the front of the address will cause the mail to go to the default recipient, but it certainly qualifies as something for nothing!
Inside, it's one tight-packed board.
Bigger versions

The two-port model is much larger, but works the
same.

Dual serial ports on the larger Sharer support
twin modems.
Lightspeed also make versions of the IP sharer with two and four serial ports, for use with ISPs which support multiple simultaneous connections to the one account. The multi-port Sharers can be configured to "money saving mode" or "time saving mode"; in the first mode, the extra modems only dial in when the Sharer is heavily loaded; in the second mode, the extra lines are used all of the time. Apart from this, the multi-port Sharers work in exactly the same way as the single-port ones, but can handle the load of multiple simultaneous users better.
Overall
The IP Sharer is a gem of a product. If you've got a home or office network that needs Internet connectivity but you don't want to shell out for an expensive router and ISDN connection or fool around with Windows proxy servers or Linux boxes, this is the budget option you can have working in an afternoon. Nothing more to buy, nothing to maintain, no muss, no fuss.
Micronet, the manufacturers of the IP Sharer, are at http://www.micronet.com.tw/.
Pros: |
Cons: |
|
|

