The ten-minute ring light
Date: 1 November 2007 Last modified 03-Dec-2011.
A ring light is a doughnut-shaped lamp.
If you look out through the hole in the middle of the doughnut - or, more practically, if you poke the lens of your camera or microscope through the hole - the light from the lamp will hit whatever you're looking at, from all around the lens.
This gives very even, shadow-free illumination, even if you're trying to do something like take a photo of the inside of someone's mouth.
A ring light is the next best thing to being able to shine a light out through the lens itself to illuminate the target. That's actually possible with some borescope-type devices, but not with ordinary cameras or microscopes.
Ring lights aren't much use for ordinary photography. Even if you've got one that's bright enough (ring flashes exist as well), the result will look similar to that from on-camera flash. People's faces will look flat, and everybody will have red eyes. For normal photography, you don't want the light to be pointed the same way as the lens.
For close-up work, though, ring lights are excellent. They still don't make things look natural, exactly, but they light up awkward objects better than anything else. They're a very useful accessory for medium-power microscopes, and macrophotography.
Ring lights are, however, quite expensive. And making one yourself is difficult.
I, being both cheap and lazy, was determined to solve these problems.
And I have succeeded!
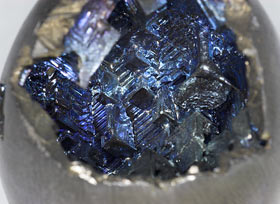
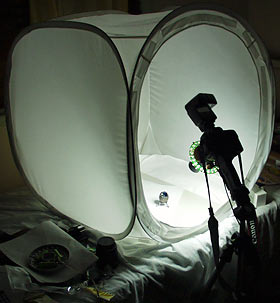
This is a picture of the crystals on the inside of a bismuth egg...
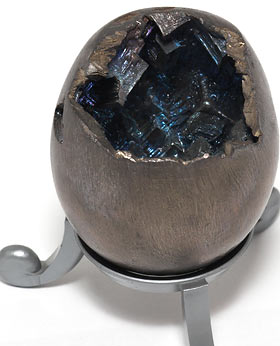
...which looks like this, at best, when illuminated by normal lighting.
The ring light doesn't give you much sense of the shape of the cavity inside the egg, but it lights the crystals up beautifully. There's no other way to do that. You can try shooting long exposures while jockeying a flashlight around next to your camera and come close, if you're lucky, but a ring light gets it right every time.
The ring light I used to take the picture cost me $AU12.75 including delivery, plus literally ten minutes of my time. It's taken me far longer to write this article than it took me to make the light.
The challenge
I've been toying with the idea of getting, or making, a ring light for a while now.
I thought I might build something out of the nifty LED board modules that MeasureExplorer sell. Or perhaps just buy a pre-made ring light.
Most ring lights, even ones that're obviously based around only ten bucks worth of white LEDs, are very expensive. But the eBay store of Gain Express Holdings has a selection of LED ring lights, priced from $US67.90 to $US107 including delivery.
Their $107 light has 80 5mm white LEDs, mains power, variable brightness, and a simple thumbscrew mounting system to suit lenses up to 70mm in diameter. It actually looks like a pretty nifty product for the money.
And then, there's the build-it-from-scratch approach, as used by Joris van den Heuvel.
Joris is on something of a ring light odyssey.
He started here, with a very nice 30-LED light with a custom power supply. Then he needed a bigger one to fit a new lens, so he made a 90-LED version. Then he wanted one that could be used on a lens with a rotating barrel, so he made a 140-LED version that could.
Then he was dissatisfied with the bluish colour temperature of the LEDs (which didn't match any of his other photo lights) and so moved on to a cold cathode fluorescent version. Then he revised that one with a reflector.
Then he made an outrageous fibre-optic contraption.
I applaud Joris for his devotion to the cause of perfect home-made macro lighting, but I do not share it. I wanted something a little more readymade.
The solution
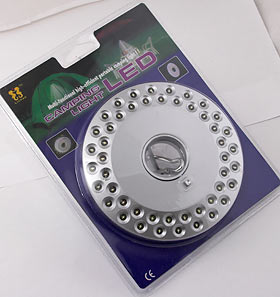
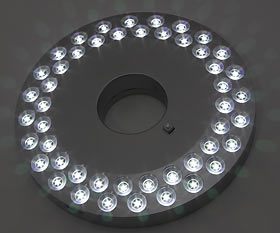
I found it in this LED camping light.
Lights like this are all over eBay at the moment. They're often described using the word "UFO"; here's a search that finds a bunch of them (and here's the equivalent search on eBay Australia).
Some of these lights have LEDs all the way in to the middle, in a decorative spiral pattern. We don't want those ones.
Most of them have LEDs in rings around the edge. That looks rather promising.
My light cost me $AU12.75 including delivery to Australia from this Hong Kong eBay dealer.
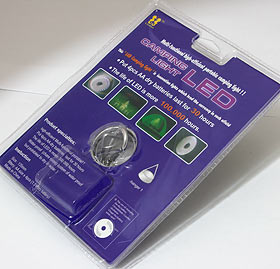
It's got 48 LEDs. It runs from three AA cells. There's a pushbutton power switch, and a hanger doodad that fits through the hole in the middle. And that's about it.
Apparently batteries were meant to be included - but for this price, you don't get 'em. That didn't bother me much, since you can practically hear the mercury sloshing around inside the knockoff Chinese batteries you usually get with gear like this.
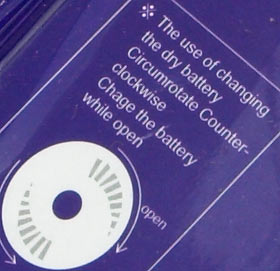
You don't get a lot of Chinglish for this kind of money, either.
First question: Does the bugger even work?
Success!
OK, on to the surgery.
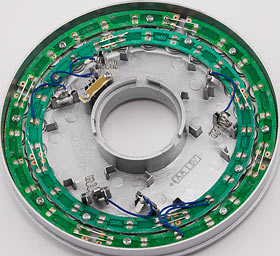
Inside, the camping light is obviously a ring light just waiting to be made.
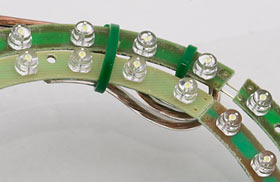
The LEDs are mounted on two rings of circuit board, and the wiring is very simple; all 48 LEDs are connected in parallel across the three batteries.
Usually, you need some sort of current limiting circuit to drive LEDs. White LEDs want to run from about 3.6 volts, though; if that's all your power supply can ever deliver, you can just connect the LED straight up to the power source and you're done.
If you connect a bunch of LEDs across three alkaline AAs, they'll haul the terminal voltage of those AAs down from 4.5 to about 3.6 volts, and thus work perfectly well without so much as a resistor in the circuit.
I multimetered the circuit just to make sure, and yep, there it was. Bang on 3.6V from fresh AAs, and about three quarters of an amp flowing.
That makes this about a 2.7 watt light, with each LED delivering a perfectly mellow 56-odd milliwatts. The LEDs are running at well under 20mA each, which means they ought to last approximately forever.
0.75 amps is a lot of current to pull out of AA cells, though. From alkalines, this light would only run at something close to full brightness for maybe half an hour. It'd be usefully bright for several hours, though; as the batteries flatten, the current drops as well.
The 3.6V working voltage, though, also means that this light will work fine from NiMH or NiCd batteries. They're only 1.2V per cell to start with, but can deliver far more current than alkalines without their output sagging.
I was originally thinking of running the LEDs from a plugpack power supply or a custom battery pack. But then I looked at the battery holder the light came with and figured that the Path Of Greatest Laziness was just to use that.
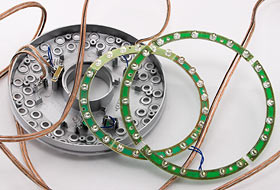
It took me only a few minutes to unscrew the LED rings from the light casing, and replace the short delicate wires from the batteries to the rings with a length of figure-8 zip cord.
The hole in the middle of the smaller LED ring has a diameter of about 93 millimetres, which is huge by the standards of commercial ring lights. The vast majority of SLR camera lenses will fit through with lots of room to spare.
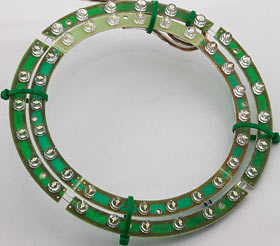
A few cable ties hold the two rings together.
The wire bridges that connect the four segments of the outer ring are quite delicate - one broke off and had to be resoldered when I foolishly used the wire-bridge notches as cable tie locations. But the whole arrangement is pretty robust.
Just the same, though, you shouldn't leave wires dangling off circuit boards so that anything that yanks on the wire will be pulling on a solder joint. Loop the wire back and add some sort of strain relief, like the extra cable tie I used here.
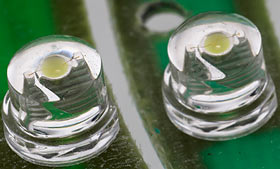
5mm LEDs usually have a much taller lens than this. The short lenses make these LEDs ideal for area lighting - they have a very wide beam.
That's not so great for photo lighting, because you're likely to be using a ring light with a lens that has a pretty narrow field of view. It's actually good for a ring light to have somewhat diffuse output; the relatively narrow beams of standard 5mm LEDs produce noticeable separate pools of light in close-up photos. But this is way too wide. For best results I'd need to put some sort of reflector around the rings.
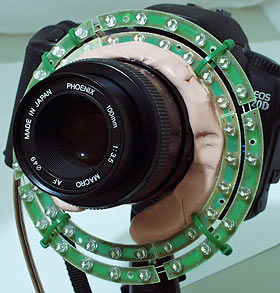
Never mind that for now, though. Let's just attach it to a camera and call it a day.
The sensible way to do this would be by making a proper housing, with some sort of adjustable clamp or screw mounting system that lets you adapt the light to lenses of different diameters. It could even incorporate a reflector, made from a shiny bowl or something.
But all that'd probably take more than ten minutes.
Silly Putty doesn't.
(Actually, that's "Thinking Putty", which I write about here. It also helped me out in my fingerprint scanner review.)
Dow Corning 3179 Dilatant Compound (to give Silly Putty its formal name) is good for this kind of job, because it's sticky enough to stay put but very easy to peel off. But it also "creeps" rapidly when under tension, from the weight of the light and its power cable. The light rings sink into the putty over a period of minutes, and the putty itself drips off the camera.
Still, it's close enough for government work.
(The lens in the above picture is my cheap but optically excellent Phoenix macro, which I talk about in my old EOS-D60 review, and the newer EOS-20D piece.)
Overall
As you can see in the above picture, this ring light really does need some sort of reflector around its edge, to stop tons of light being wasted far from the field of view of the lens.
It's also not tremendously bright. Again, it'd be better with a reflector, but as it stands it only throws about enough light at a target a foot away to give you 1/10th of a second exposures at f/3.5 and ISO 200.
If you're using the smaller apertures that're essential to get reasonable depth of field out of macro shots, there's no way you'll be able to use this light to photograph anything that won't sit still for a several-second tripod exposure.
This is the case for a lot of other ring lights too, though.
If you want to be able to fill the frame with a razor-sharp image of a passing mosquito, no ring light is for you. You're going to have to save up for a big chunky macro flash rig.
If you just want something that'll throw a nice even light on teeny tiny stationary objects, though, one of these camping lights gets you nearly there, for nearly nothing.
