CPU cooler installation - getting it right
Review date: 18 August 2000.Last modified 03-Dec-2011.
CPU upgrades are supposed to be simple. Well, CPU upgrades in which you just pop out the old CPU and install a new one are, anyway. If you change to a new kind of CPU that needs a whole new motherboard, that's a different kettle of fish, but the CPU-installation part of the upgrade still ought to be easy enough.
Both square "socket" type processors and cartridge-encased "slot" type ones are meant to be no trouble to install. People are nervous about it for no reason. It's not like changing your own oil, it's more like just changing your own windscreen wipers. Right?
Well, usually, yes. But a few recent developments have conspired to make many people's processor installation experience exactly the sort of hardware-destroying nightmare that timid people who get someone else to do all of this stuff for them are trying to avoid.
If you're considering assembling your own computer, or you're the bunny in your small business who's been volunteered to swap new hardware into those old boxes around the office, then you'll need to know a couple of things.
What's needed, to stop newcomers from pulverising some of the newer CPU designs in the process of installing them, is an illustrated step-by-step guide. So I've made one. Click here to skip straight down to it, if you're an impatient type.
To find out why you may need step by step instructions, though, you have to know about the new CPU types.
Form factors and fragility
Intel and AMD, who between them practically own the PC processor market, both now mainly make single-chip CPUs that don't need separate cache memory chips. Intel's current Celeron and Pentium III CPUs are single-chip; so are AMD's Duron and current model Athlons.
Because these CPUs don't need extra chips, they don't need to be built into a big cartridge. Both manufacturers are still making cartridge-type processors - Intel's Slot 1 and AMD's Slot A, which use mechanically identical but electrically completely different connectors - but they don't need to; there are no major components on the circuit board in the cartridge but the CPU itself.
It's considerably cheaper to make CPUs with no cartridge, so both Intel and AMD now prefer to sell the socket versions. Intel's one is Socket 370, named for the number of pins; AMD's is Socket 462, named for the same reason, and also known as Socket A.
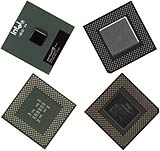
Socket 370 CPUs. On the right, a 400MHz Celeron; on the left, a P-III. Note the difference in the size of the raised portion - the "contact patch" - in the middle of the package. The P-III, and Celerons from the 533A model upwards, use the small-patch "flip chip" layout, which is significant, as we'll see.
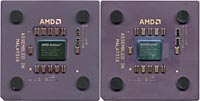
Socket A CPUs, top view only this time. Again, a small contact patch.
While Intel's still shifting quite a lot of Slot 1 Pentium IIIs, a major upgrade these days will probably see you using a socketed CPU.
Whatever kind of processor you've got, you need to put some kind of CPU cooler on it. A "cooler" is a metal heatsink with at least one fan on it. The fan's needed to keep the heatsink size down, because modern desktop processors produce enough heat that passive cooling with a fanless heatsink is only possible if the heatsink is really humungous.
You can use a merely big heatsink, with no fan attached to it, if you've got a case designed for maximum air flow and, probably, an extra case fan to help out the one in the power supply. But purely passive cooling is very challenging. Apple's elegant little Power Mac G4 Cube has no fan, and uses nothing but convection for cooling. But it goes into standby mode automatically if you block its vents by putting something on top of it, and it will probably still crash after a few minutes if the obstruction stays there.
So you need a CPU cooler.
And herein lies the problem.
CPU coolers for slot-type processors aren't too tricky a proposition. The old, fully enclosed Single Edge Contact Cartridge (SECC) processor design completely encases the CPU circuit board, with a "thermal plate" on one side onto which you clip the cooler. All Slot A Athlons are SECC, as are various older model Pentium II and III.
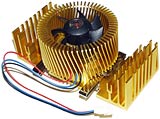
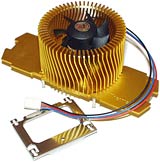
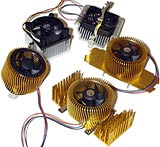
Here's a Thermaltake Golden Orb cooler for SECC processors. It's a flashy number, but it works well and only costs $AU39.60.
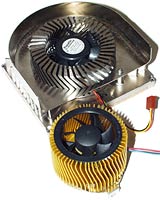
The basic design of the various kinds of Golden Orb came from the much more impressively engineered Turbocooler, made by Hewlett-Packard some years ago. The one behind the Orb in this picture is inserted in its original workstation CPU cooling housing; various people bought these old Orbs, popped them out of the housing and re-drilled them to suit modern CPUs.
The Golden Orb is the cheap and cheerful version of the Turbocooler. It's reasonably efficient (though not nearly as good a heat-remover as the original), it looks nifty, and it's available for various kinds of processor, without retrofitting.
Most coolers for SECC CPUs click onto the thermal plate with no fuss, using a simple no-tools design that holds pretty firmly and yet can generally be removed quite easily. Well, provided the clips don't warp and lock in place, as sometimes happens. Then you may find yourself requiring the services of a Russian trawlerman with a 16 pound sledgehammer. But only to take the cooler off; putting even warped-clip SECC coolers on is still generally very simple.
More recent slot-type PC CPUs, like Intel's newer P-IIIs, use the "SECC2" cartridge, which is pretty much just a SECC cartridge with the thermal plate removed. When there's no cooler on a SECC2 CPU, you can look at the CPU circuit board with the processor chip in the middle of it. But you generally don't get to see this, because most SECC2 CPUs have a cooler installed from the factory.
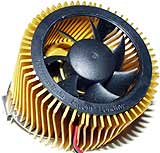
If yours doesn't, or if you want to upgrade a mediocre stock cooler, you can use something like this. Another Golden Orb, this time for SECC2, without the extra fins and somewhat cheaper, at $AU38.50.
Coolers attach to SECC2 CPUs by means of pins through holes in the circuit board, retained by a clip on the other side. Joe Average is not meant to fool with these coolers.
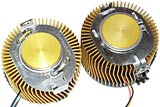
You can see the difference here; the SECC Orb's on the left, the SECC2 one's on the right. The white square on the SECC2 cooler base is factory-applied thermal transfer compound, of which more in a moment.
SECC2 CPUs may commonly come with coolers pre-installed, but anybody who installs a socketed CPU is definitely going to have to install a cooler as well. Retail boxed socket CPUs come with a cooler that's made for them, and Intel's recent efforts in this field have been quite good.
AMD, however, doesn't yet seem to have made any retail boxed Socket A CPUs, and certainly doesn't have one approved cooler for them. You buy Socket A CPUs out of a tray, and pick your own cooler at the same time. Given that they're much cheaper than Intel chips - a 600MHz Duron is faster than a 600MHz Celeron, but something like two-thirds of the price - most people find this an acceptable deal.
The basic idea for socket CPU coolers is simple enough - little moulded hooks stick out of the side of the tough fibre reinforced plastic CPU socket, and some gizmo or other clips onto them to hold the cooler down.
The hold-down gadgets are referred to as "retention mechanisms" by people whose job it is to design and sell them, while still maintaining a skerrick of self-esteem. They're often quite stiff, because the harder they clamp on, the better the thermal contact. And thermal contact is the whole idea. If getting heat from the CPU to the cooler wasn't important, we could all save a lot of time by leaving the cooler in the box.
The quality of the thermal contact between cooler and CPU - or between cooler and heat plate, in SECC processors - is linked to the clamping force. But it also depends on the flatness of the mating surfaces of the CPU and the heatsink, and on what's in the gap. The flatter the mating surfaces are, the smaller will be the tiny gaps between them, and the more heat will be transferred.
The tiny gaps will always be there, though, and they should be filled with some sort of "thermal transfer compound" - commonly known as heatsink grease. Hence the white square on the SECC2 Orb. The SECC Orb needs more grease, to cover the whole mating area between the Orb's plate and the processor cartridge thermal plate; it comes with a little sachet of the stuff.
Heatsink grease conducts heat much better than air, but much worse than direct contact. So there should, ideally, be just enough grease in there to fill the gaps, and not enough to make a goopy blanket in the joint.
Many cheaper CPU coolers have just a rubbery stick-on pad on the bottom, not grease. Thermal pads work better than a dry join, but not as well as a greased one; you can "hop up" these coolers by scraping the pad off and replacing it with an appropriate smear of heatsink grease. Better coolers these days come with pre-applied semi-solid thermal goop pre-applied, which gives you the best of both worlds.
Thermal glop isn't the problem, though. The problem is mechanical.
Crunch!
When a socket-and-CPU combination isn't the shape that the cooler designers expected, the cooler will try to rectify the situation. This is bad.
When the first of the new "Coppermine" Socket 370 processors came out, their radically smaller contact patch meant that various aftermarket CPU coolers that worked fine with the much bigger contact patch of the earlier Celerons were badly unsuited to the new ones.
When a cooler isn't made for a small-contact-patch CPU, it can end up mounted on a tilt like this, with all of the clip force pushing down on one edge of the contact patch and practically no real thermal contact at all. Do this and you'll have a CPU that overheats and causes crashes shortly after turn-on. You'll also be applying all of the force from the mounting clip to the contacted edge. Which is bad.
Coppermine-type CPUs are amazingly tolerant of physical abuse, at least as far as poorly installed coolers go. The bonding material on the top of the Coppermine die is very tough, so the CPU can put up with this mistreatment surprisingly well.
AMD's Socket A CPUs are different. They've got a similarly small contact patch, but their bonding material is much more brittle. Push a metal thing onto one corner of the top of the CPU, and you'll grind that corner right off.
On the plus side, the Socket A Durons and Athlons have four little rubber stand-off dots installed as standard, to support the CPU cooler and stop it from tilting. But the fragile contact patch means it's very easy to break the corners off, or crack the whole die.
Just because you've busted off some of the bonding material doesn't mean you've killed the processor, but plenty of people have managed to. Various CPU coolers that work perfectly with Socket 370 are a recipe for disaster on Socket A.
Here, ladies and gentlemen, is Public Enemy Number One as far as the cruel and unusual mangulation of Durons and Socket A Athlons goes. It's the original model $AU33 Thermaltake Golden Orb, from which have evolved the slot-CPU versions.
This Orb has an impressively straightforward twist-on retention mechanism that lets you easily clamp it onto a CPU. Hook on the ends of the clip, turn cooler firmly, presto.
Unfortunately, clamp-type retention mechanisms deal poorly with slight differences in the things they're clamped onto. The Socket A Duron/Athlon die stands higher, relative to the hooks on the side of the socket, than do the tops of Socket 370 CPUs. So any cooler that fits both sockets will clamp harder onto Socket A.
A simple spring clip just holds harder and harder the more it's been flexed. But a clamp has one distinct "engaged" position, and when it's clamped onto something taller than usual has to take up the extra in the clip arms on either side. These arms aren't meant to bend, so they pull mightily on the socket hooks, and the cooler pushes mightily on the top of the CPU.
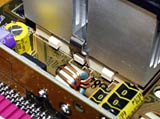
If an overenthusiastic clamp rips the hook right off the side of your Socket A - tough.
In case you're wondering, by the way, the extra hooks on either side of the broken one in this picture are standard equipment on Socket A, but not on Socket 370. Unfortunately, not many coolers can use the extra hooks. If you've got the usual kind of two-hooks-only cooler and you lose the middle hook on one side, you'll need to get a new cooler or a new motherboard. Or you can attach your CPU cooler with double-sided thermal tape, or show off your mad surface mount rework skillz and replace the socket yourself. Paying someone to replace the socket for you will probably cost more than a new motherboard.
Hook-ripping's fairly rare, though. More commonly, overpowered cooler clips on Socket A CPUs just smush the top of the CPU. And twist-lock Orbs could have been made to do it.
The Golden Orb has an unusual circular base, which is plenty big enough to cover the whole contact point of a Socket A CPU, but is too small to be supported by the little spacer dots. So it wobbles around while it's being installed, and is only supported by the die itself once you've got it onto the CPU.
This, combined with the fact that the smaller hooks on the Socket A socket can make it tricky to get the Orb attached in the first place, means that various hapless souls have managed to do horrible violence to Socket A CPUs with Golden Orbs.
You can get around the problem by bending the ends of the clip down a bit to reduce the pressure. Then, all you have to worry about is something smacking the cooler after it's been installed, and crunching the CPU that way. It's not a very elegant solution.
Thermaltake, in penance, made a revised version of the Orb. Original version on the left, new one on the right. The new one sells for the same price.
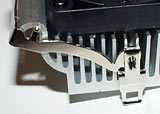
The new version, again shown on the right in this picture, has a new clip, with a rather questionable pinch-together-and-yank-up thingy on one end. It doesn't clamp on as ferociously as the twist-lock Orbs, but it's fiddly, and doesn't cure the undersized-base problem, and has still been responsible for Dreadful Occurrences in the hands of the inexperienced.
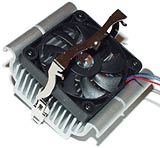
Here's another Socket A no-no, also from Thermaltake. The $AU31.90 TFCF009, also referred to as the "Harp" after its unusual curvy fin profile (more of a lyre, really, but never mind), continues the company's reputation for unusual retention mechanisms.
You hook the cooler onto the socket with the hinging handle pointing upwards...
...and then swing the handle down, so it clips under one side of the "harp", to lock the cooler in place.
On Socket 370, this design works very well indeed, and does away with clip-fiddling just as well as the twist-lock Orbs do. And the Harp's design means you can install it on motherboards with tall capacitors right next to the CPU socket, because the base of the cooler's no bigger than the socket itself. The Orb isn't a big cooler, but it still sticks out a bit around the socket, and thus doesn't fit on some jam-packed boards.
In fact, the only thing wrong with the Harp for Socket 370 is that it comes in an Orb box, which still tells you to twist the cooler on.
Image: enthusiastic amateur with pipe wrench and determined expression.
Try installing a Harp on a Socket A board, though, and you'll probably be sorry. It's got the over-clamping problem of the Orb, but the hinging arm makes it even better at crushing the CPU, or ripping hooks off the socket.
Again, you can make things better by bending the clip-ends, and at least the Harp has a big enough base that it engages the spacer dots properly. But it's still a dodgy proposition.
So what can you safely install on a Socket A CPU?
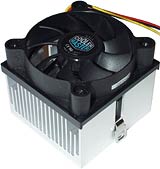
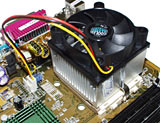
A plain spring-clip cooler with a normal-sized base. Like this one, for instance.
The whimsically named Cooler Master DP5-6H51 is an utterly unrevolutionary cooler which happens to work well on Socket A CPUs. It's your standard finned block of aluminium with a decent-sized fan, and it costs $AU28.60, as befits a simple design like this.
Installation step by step
Here, patient reader, is how to install the DP5-6H51, and any other similar clip-on cooler, properly.
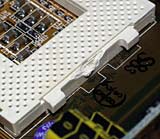
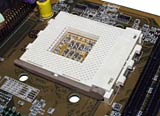
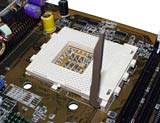
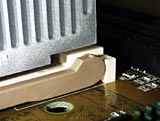
The CPU socket. Modern socket motherboards use Zero Insertion Force (ZIF) sockets, which have a lever on one side that locks the CPU in place. The lever's on the front of the socket in this picture. Note also the raised side of the socket, with the cam-operated locking mechanism in it.
Unclip and raise the lever, and you unlock the socket...
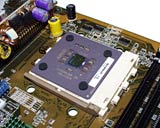
and can drop the CPU in. Modern socket CPUs can only be installed in one orientation; they're "keyed" by missing pins in the corners.
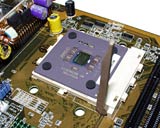
Push the lever back down until it clicks into place, and the CPU will be locked in. Time to attach the cooler.
If you've got a cooler with no thermal transfer pad or pre-applied goop on the bottom, you'll need to put a thin layer of "heatsink grease" on the top of the CPU now. If you're not overclocking - winding your CPU up beyond stock speed - the amount of grease doesn't matter tremendously. Even if you overdo it badly, all you'll do is make a sticky mess on top of the CPU under the cooler. And you'll still get better thermal transfer than a stick-on pad manages.
The Cooler Master cooler has a pre-applied square of chewing-gum-like thermal compound on the bottom, covered with a peel-off protective sheet. This stuff displaces well under pressure, like grease, but doesn't require any user fiddling. Then again, if you want to re-use the cooler, you should scrape off the compound and replace it with ordinary grease, because you'll never line the cooler up quite the same way twice.
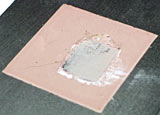
Here's a Cooler Master heatsink that's been on a processor already - you can see where the thermal compound's been pushed out by the pressure.
Once you've sorted out the thermal compound situation, it's time to hook on the cooler.
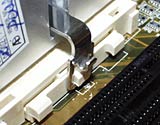
Cooler clips usually have one end with no way to push it down, and another end with some sort of thumb-pad or plier-grip-tab or something. The end you can't push on is the one you hook on first.
Note the rebate under the cooler, that matches the taller hinge portion of the socket. Try to put the cooler on the CPU in any other orientation and it'll mis-fit in ways which you will probably find unamusing.
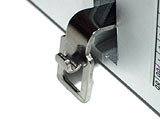
The other end of the Cooler Master clip. It's made to neatly receive a flathead screwdriver blade, saving you from putting a dent in your thumb and a spike in your blood pressure graph by jamming the clip on without a tool.
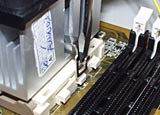
With a screwdriver, it's easy to push the clip-end down to engage the hook on the side of the socket.
Presto, one clipped-on cooler.
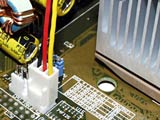
Once the cooler's clipped on, remember to plug in the CPU fan. If you don't, you'll have a computer that runs great for a few minutes, then crashes over and over and over.
Result: One neatly installed cooler, on one completely undamaged CPU. Widespread adulation follows. A national holiday is declared.
You can do this!
When you've got a cooler that works properly with your CPU, socket CPU installation really is easy. When you've got a cooler that doesn't fit properly, because it's not made for Socket A or because it's been designed by beetle-browed knuckle-draggers (I'm extrapolating, here, but this is a parsimonious explanation for some of the coolers I've seen), then you may find yourself converting your expensive new CPU back into its native sand, and scare yourself off doing your own upgrades forever.
There's no need for that. Get the right cooler, put it on properly, and even the most fragile of CPUs will survive. If you're in a position where displays of competence will merely result in the assignment of more work you don't want, then banish this article from your mind. But if you're not, go for it. It's easy.
Buy CPU coolers!
Readers from Australia or New Zealand can purchase CPU coolers from
Aus PC Market.
Click
here!
(if you're NOT from Australia or New Zealand,
Aus PC Market won't deliver to you. If you're in the USA, try a price search
at
DealTime!)
